
Digital Assist Funnels
What's on this page
About Funnels
Within the Funnels tab of Digital Assist you can track how visitors travel through steps on your site, and understand how they are converting. Within each funnel you can identify drop-off points and view analytics to help you determine why drop-off points are occurring.
Creating Funnels
Follow these steps to create a new funnel.
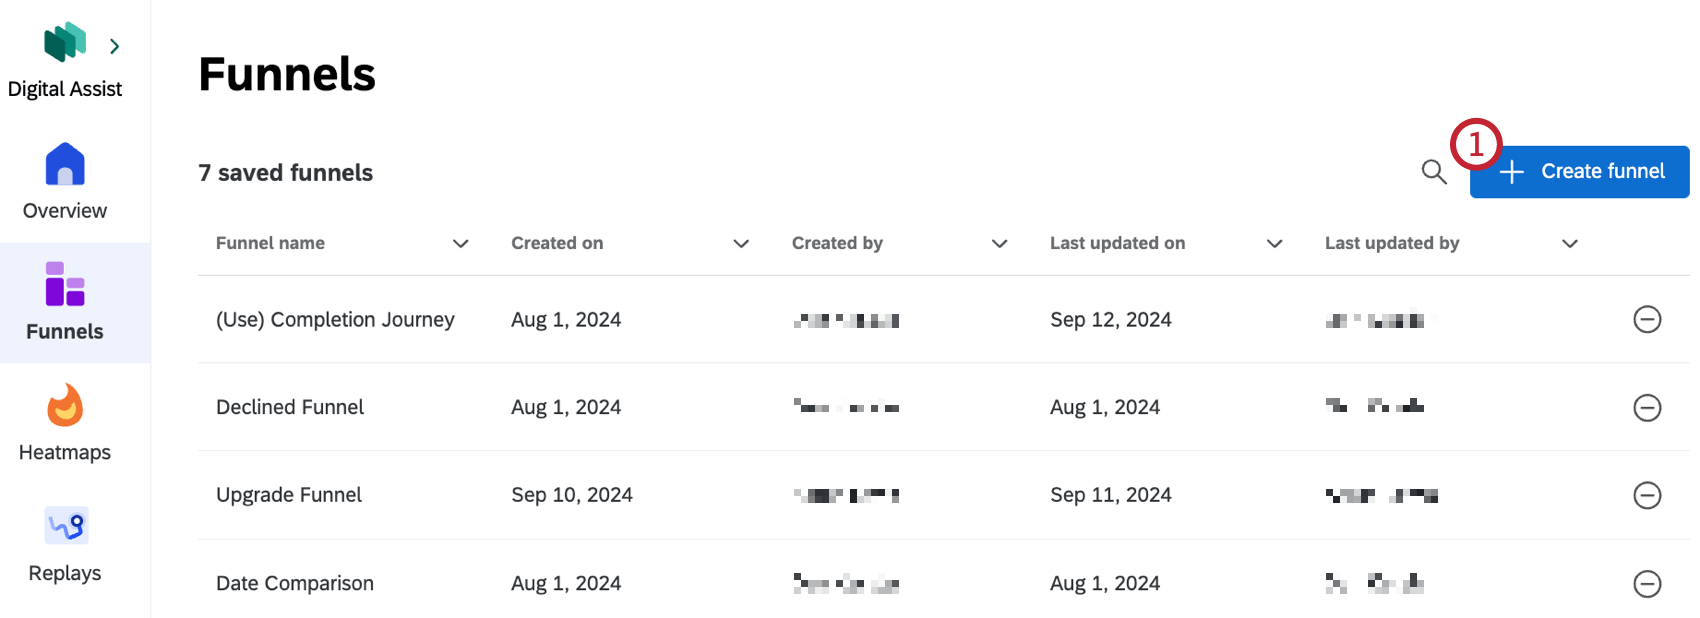
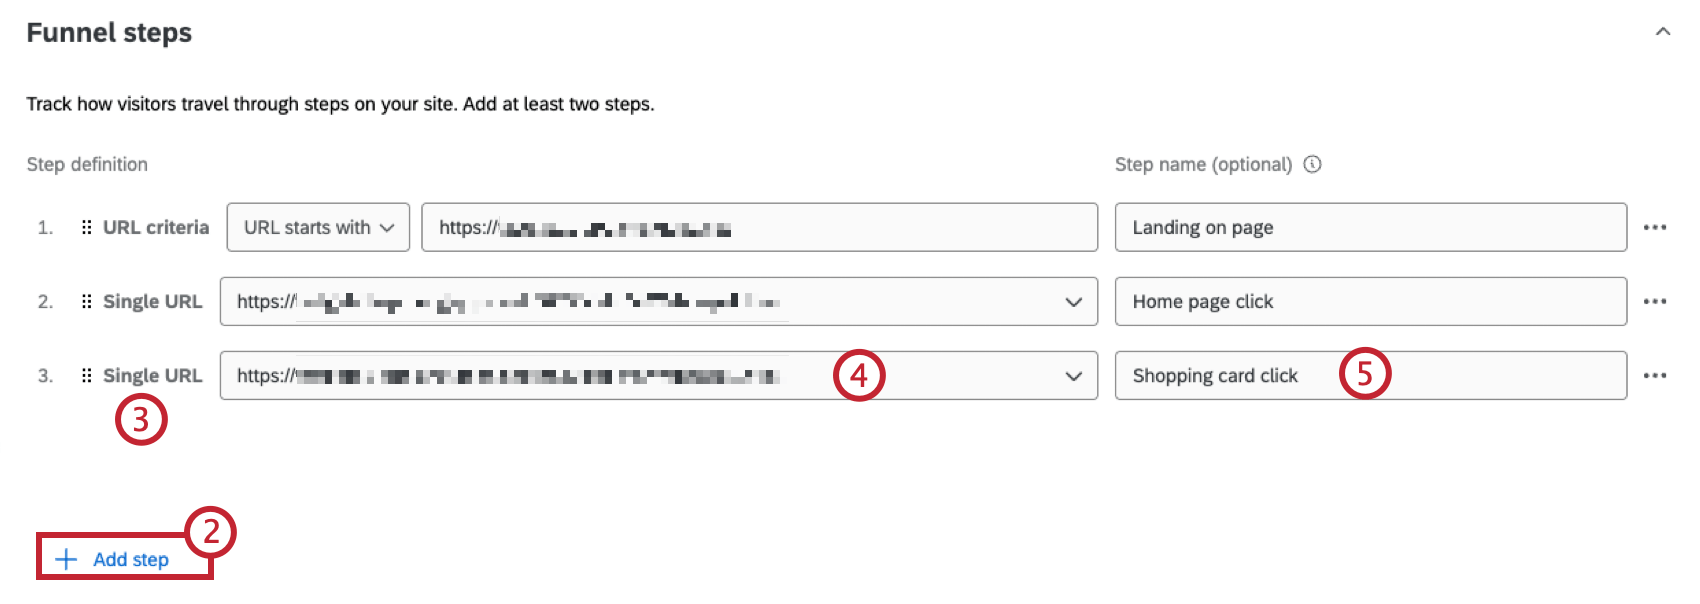
Qtip: You can add up to 10 steps in each funnel.
- Enter single URL: Define your funnel step as a single URL, such as your website’s homepage.
- Define URL criteria: Define your funnel step using a combination of multiple pages.
- Select custom event: Define your funnel step using a custom event defined by your brand.
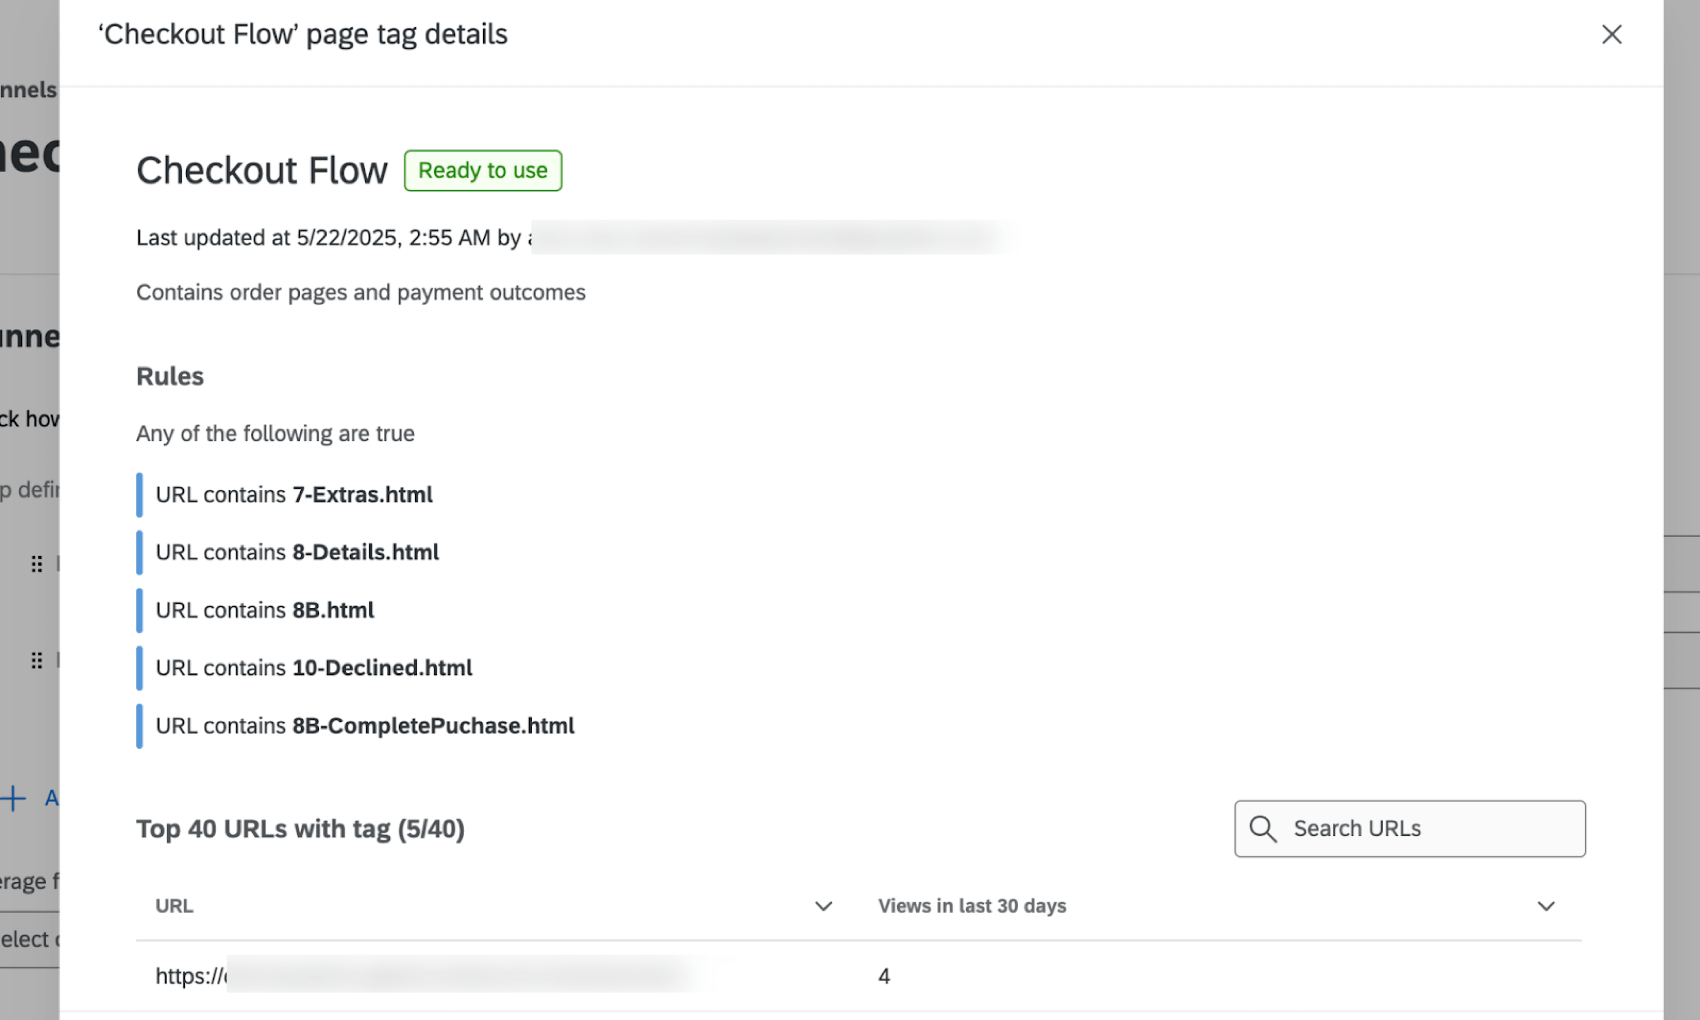
- Select page tag: Define your funnel step using a page tag defined in a DXA project.
Qtip: When adding page tags, you can click View page tag to see the rules that define the tag and the pages that are included in the tag.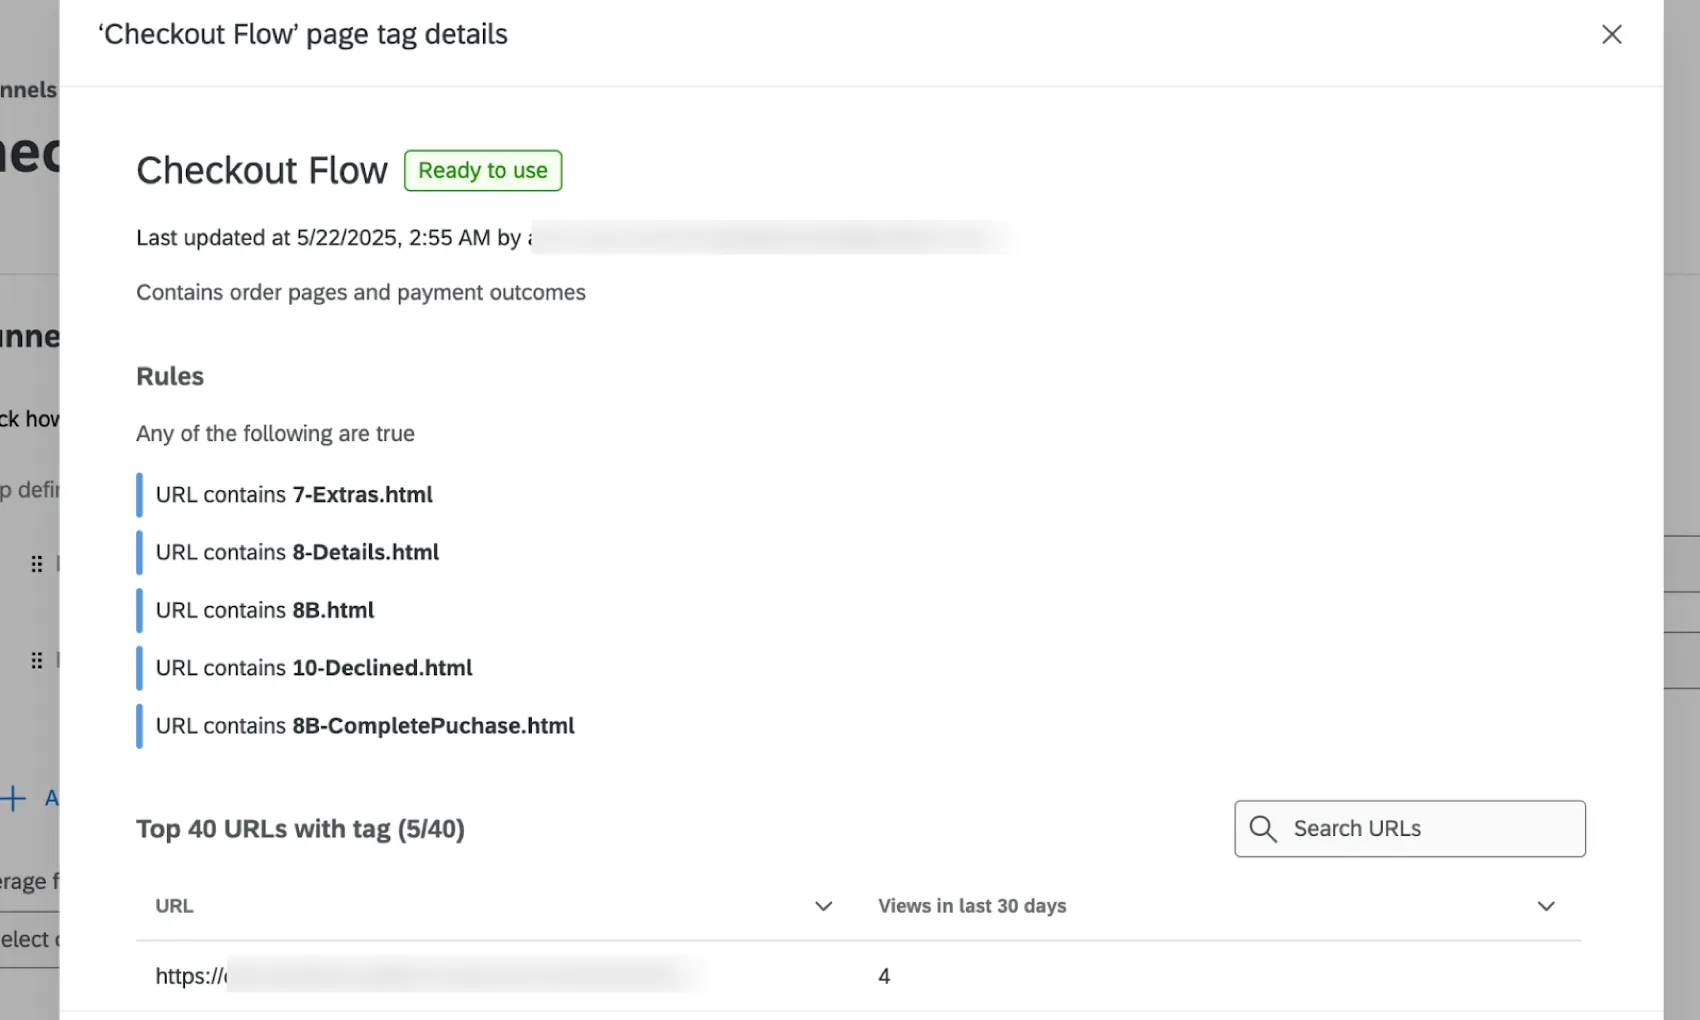

Qtip: This is the average value of a completed session on your site. After a value, you’ll see revenue earned and missed revenue potential calculations in the funnel.
Attention: If you want to view your funnel in the future, you must save it. See Saving & Editing Funnels for more information.
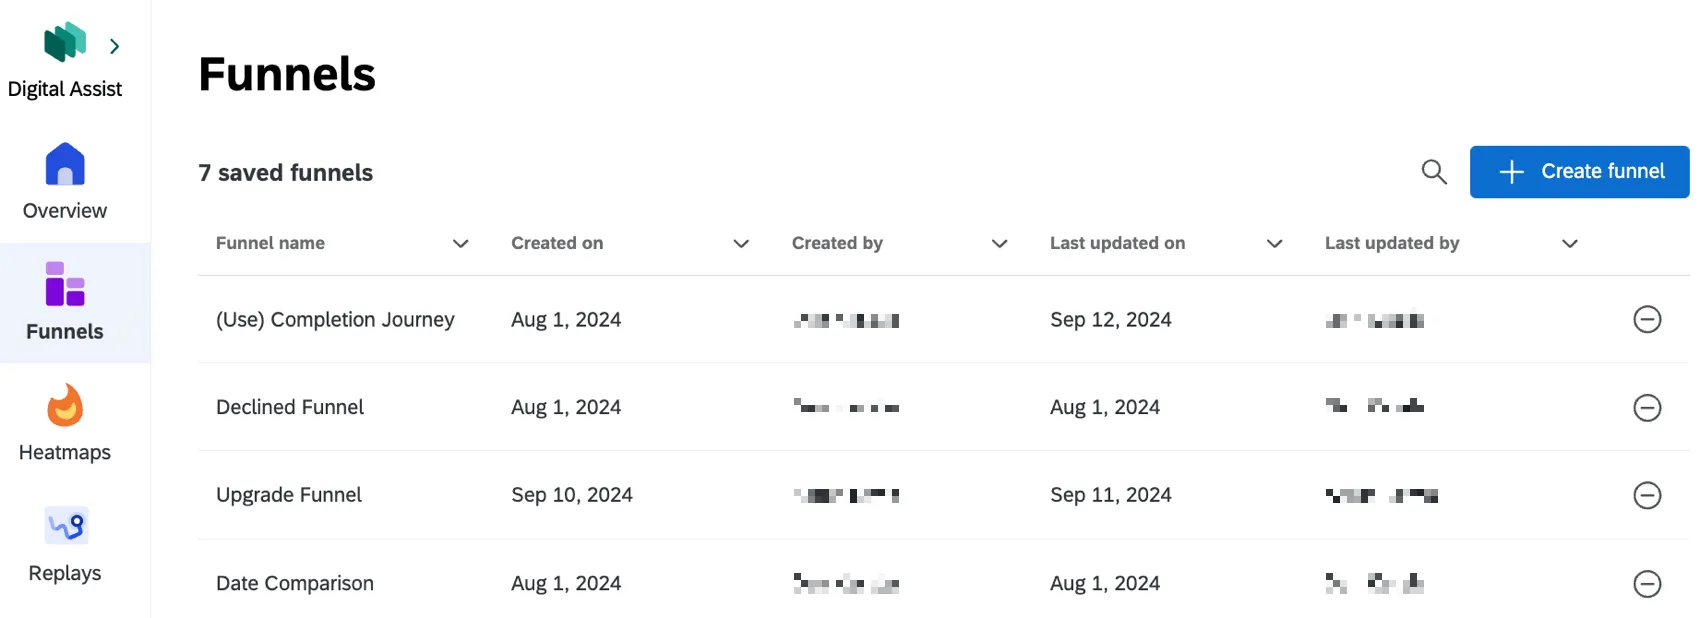
Viewing Funnels
After you’ve created a funnel, you can scroll down to view it immediately. You can also click a funnel from the list of saved funnels within the tab to view it.
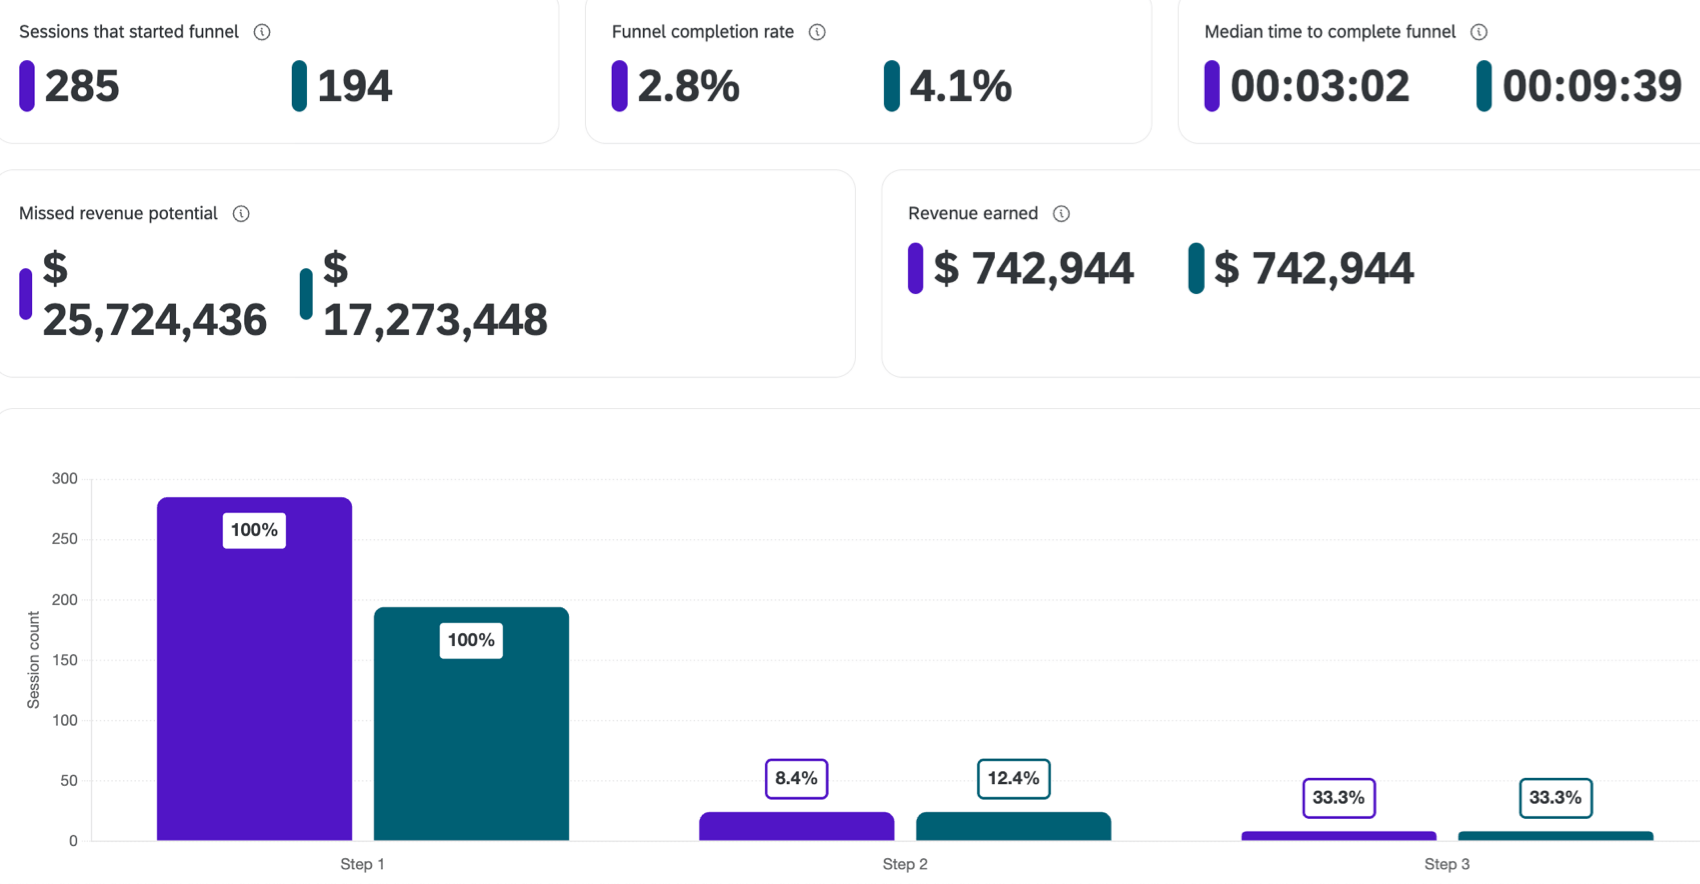
After the funnel steps, scroll down to see funnel metrics. In addition to basic metrics, there is a bar chart that shows how many sessions are converted in each step along your funnel, as well as the conversion rates for each step. There is also a table that allows you to compare metrics for each funnel step.

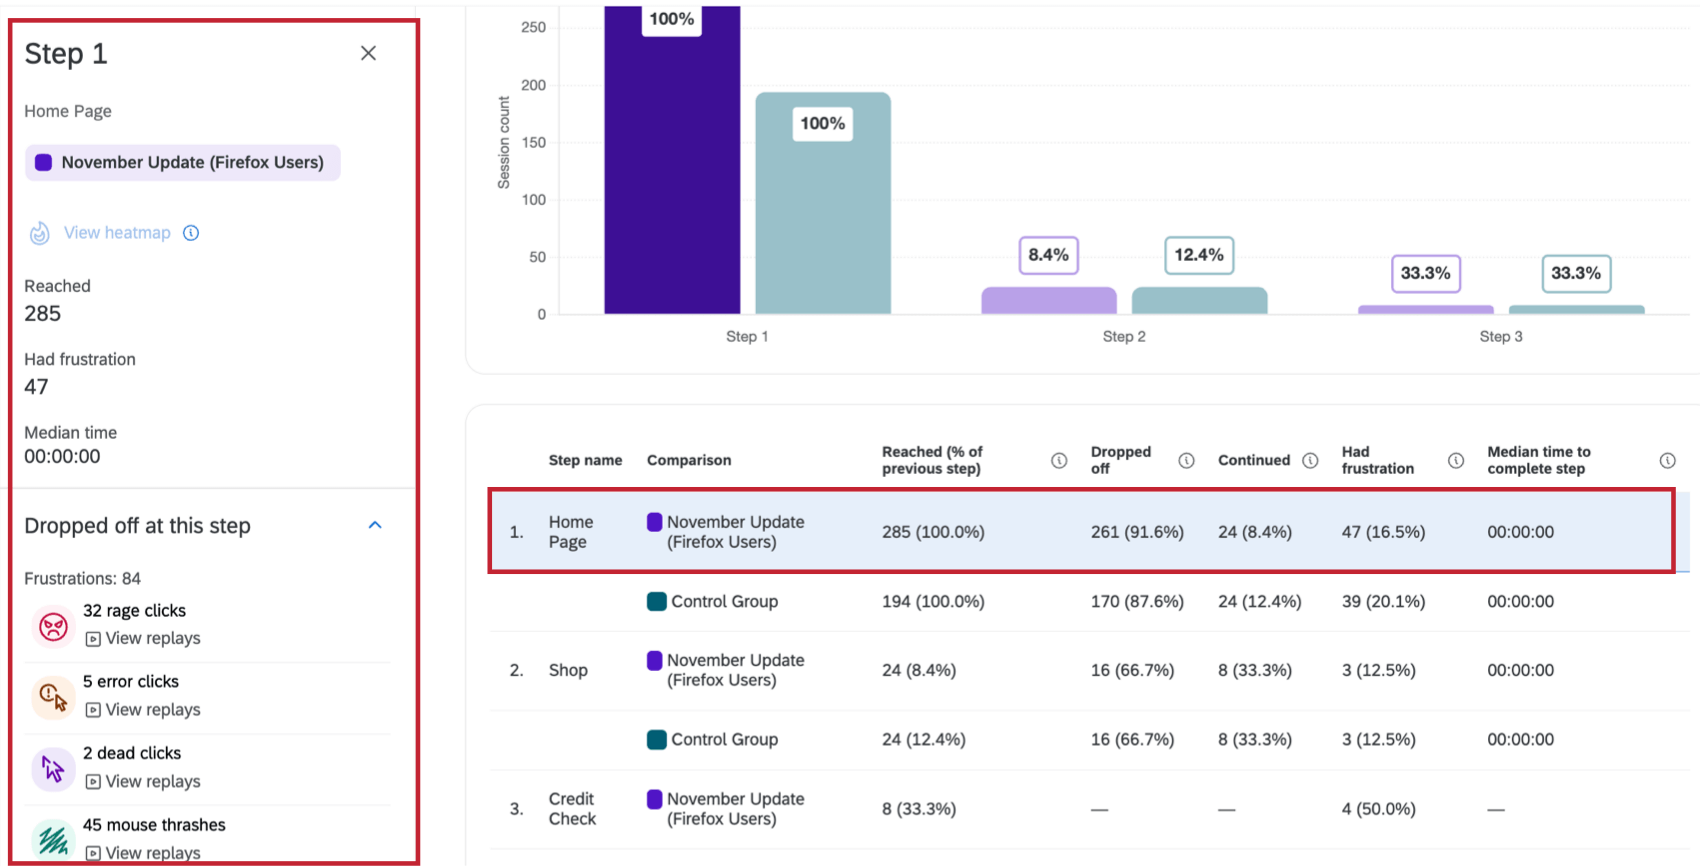
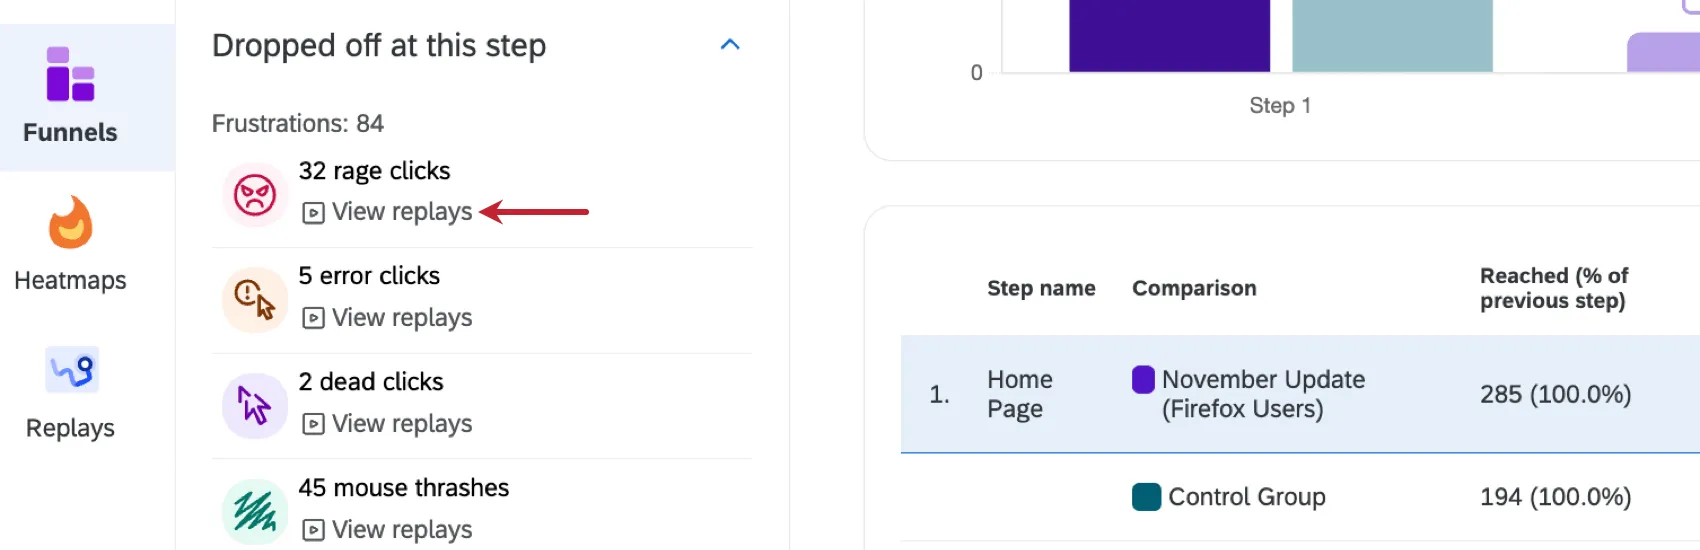
Click on a step within the table or a bar within the bar chart to view additional metrics, including how many users dropped off at this step and how many users continued to the next step.
Viewing Replays
Click View replays to view sessions from this funnel step within the Replays tab. You will see sessions with the specific frustration heuristic you clicked on.
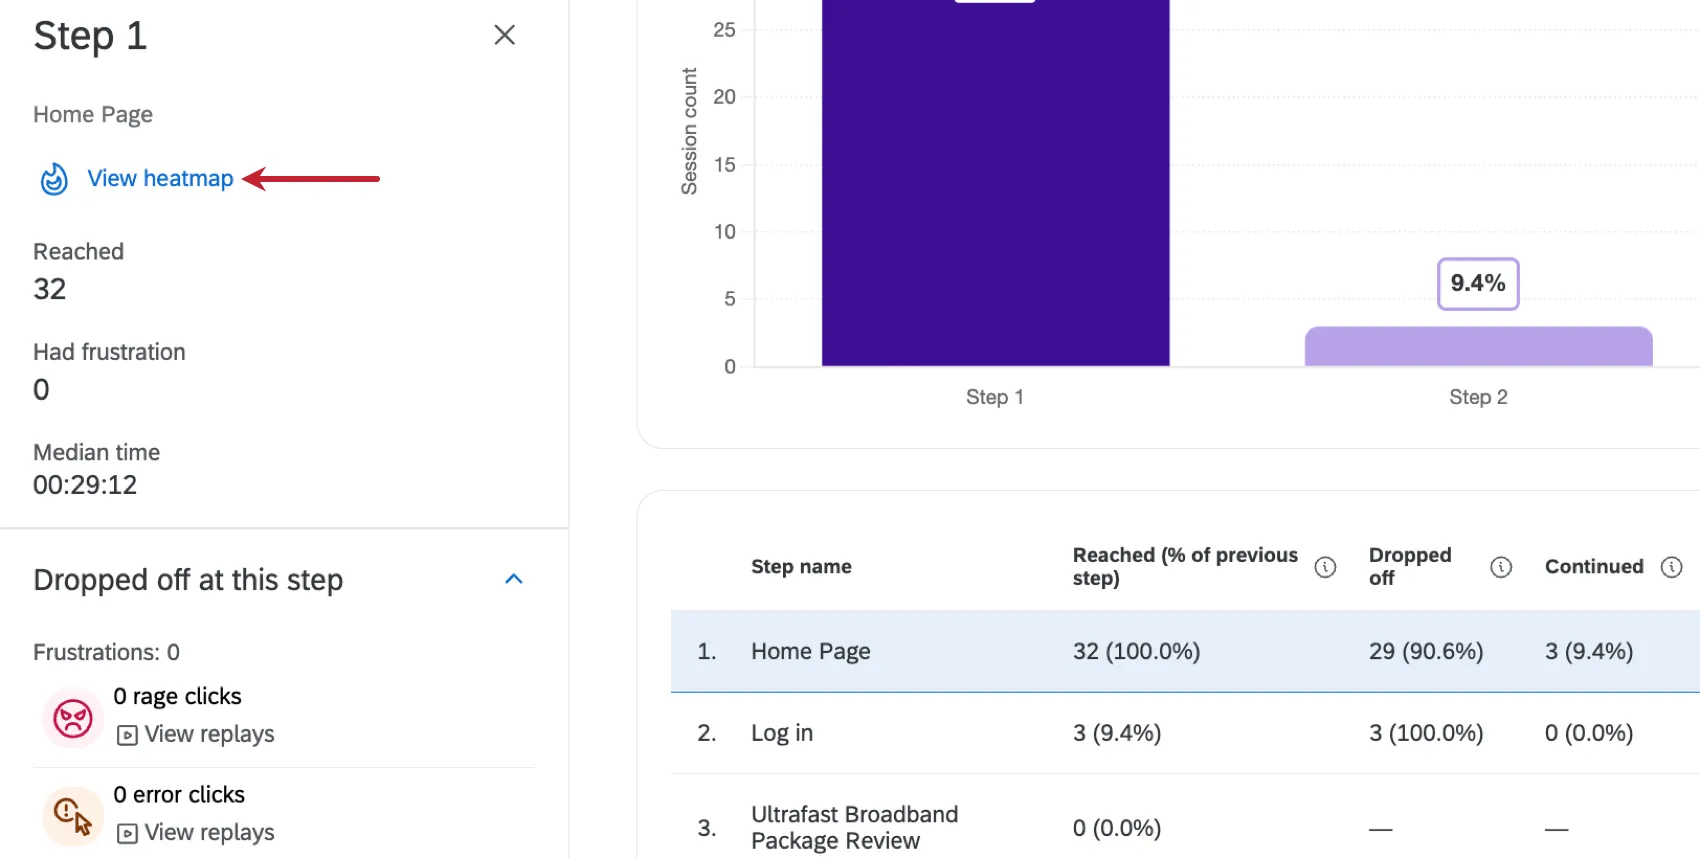
Viewing Heatmaps
Click View heatmap to view the heatmap for a specific funnel step. This option is only available when viewing a funnel step defined as a single URL.
Saving & Editing Funnels
Saving Funnels
After you’ve created a funnel for the first time, you must save it to be able to view it again. If you exit your funnel without saving, you won’t be able to view it again. Click Save in the top-right corner and give your funnel a name.

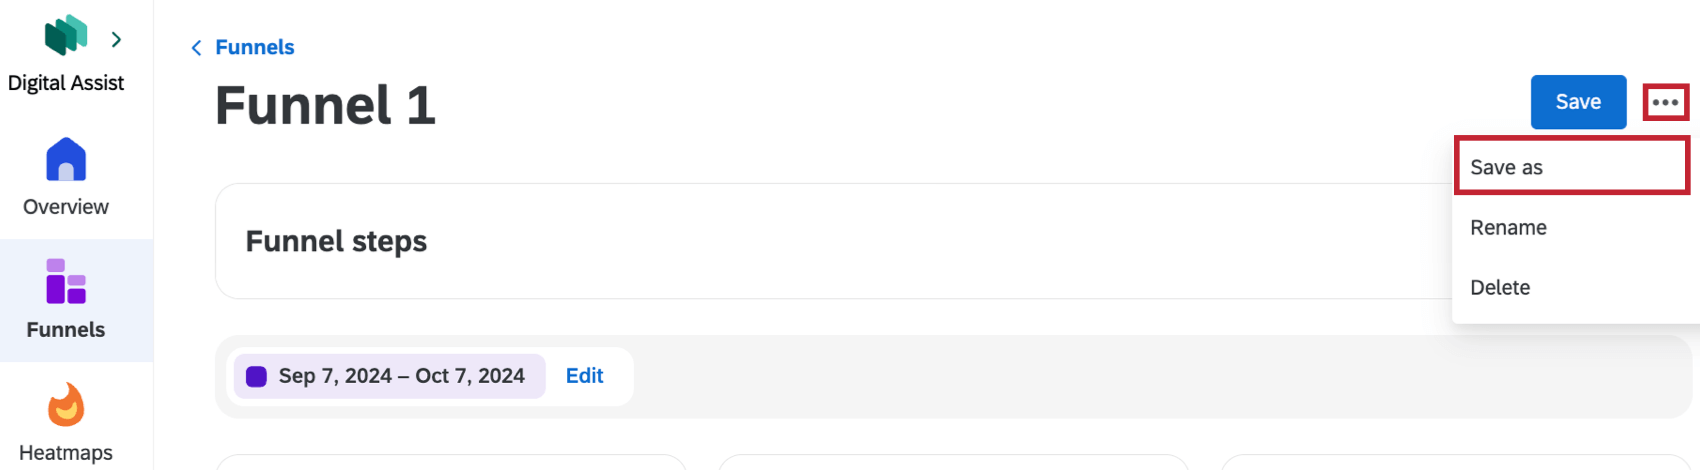
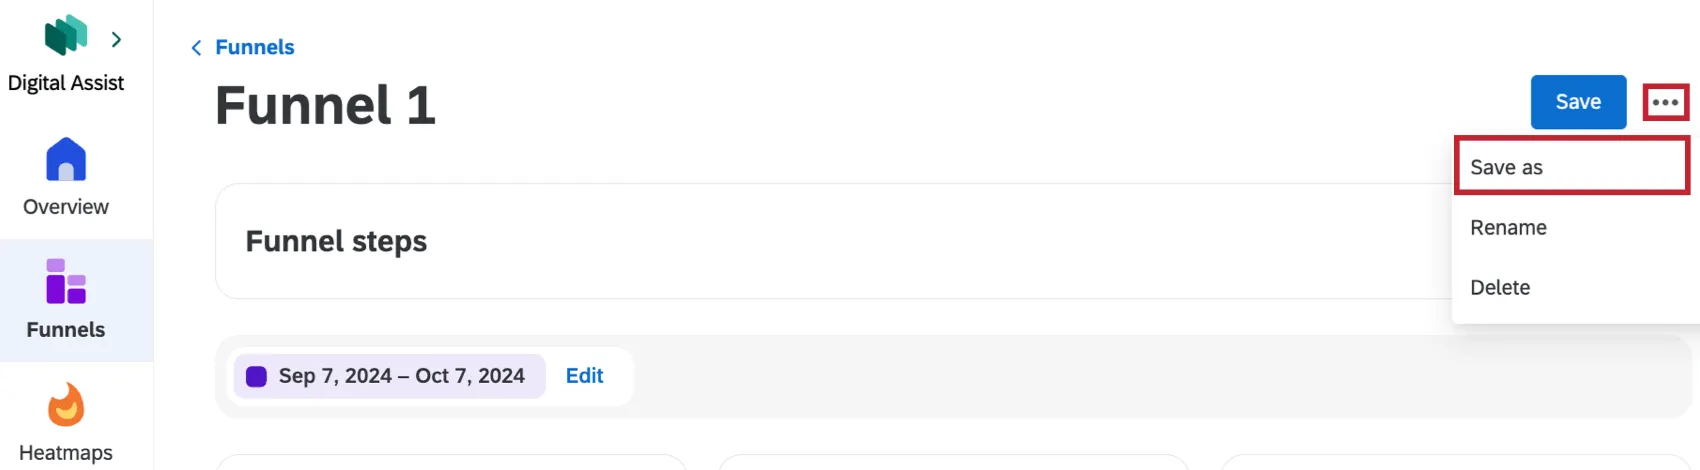
You also have to save your funnel any time you make changes to it. To save your changes as a new version of your funnel and preserve your original configuration, click the 3 dots in the top-right corner and select Save as.
Editing Funnels
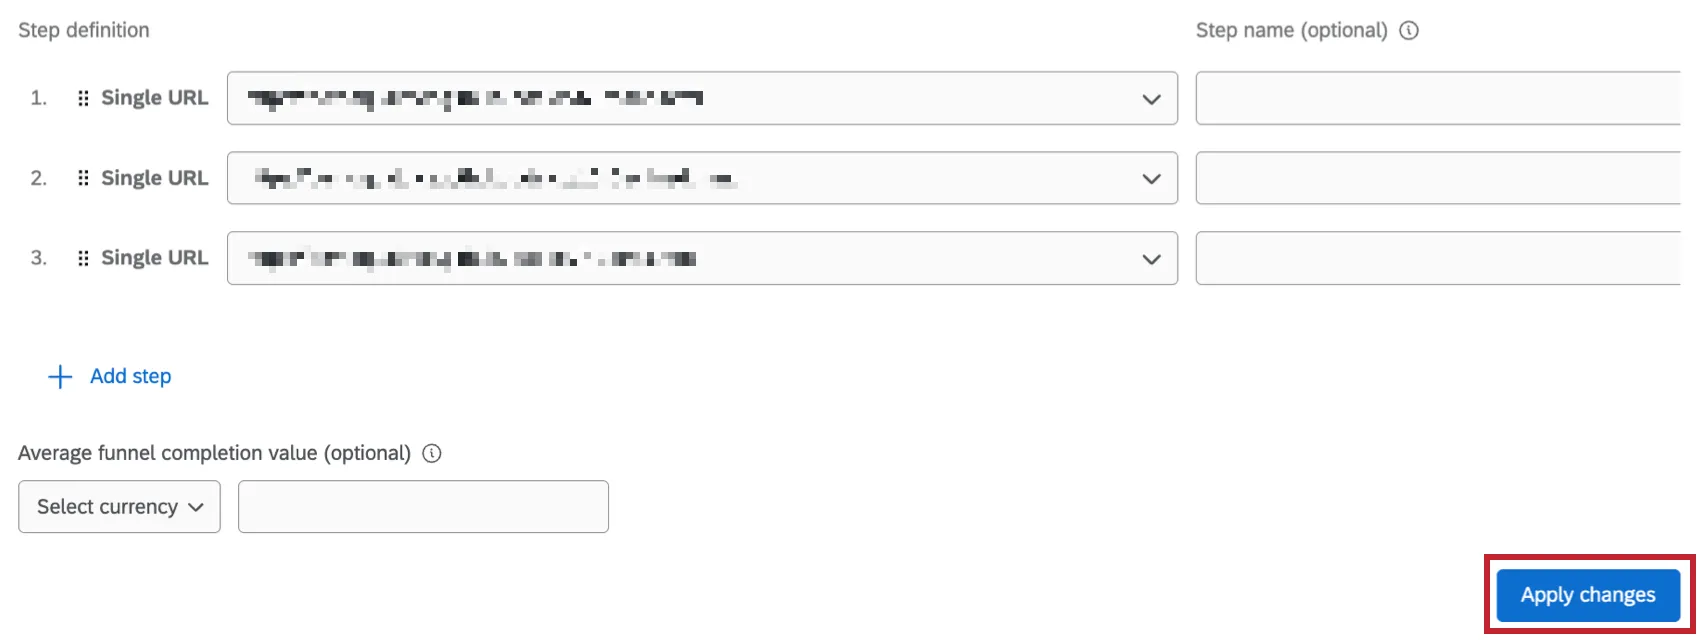
After a funnel has been created, you can continue making changes to it. Click on your funnel and make any desired changes to your funnel steps, then click Apply changes.
Your funnel will then reload to reflect any changes you’ve made. You can also click the 3 dots in the top-right corner and select Rename or Delete to rename or delete your funnel.
Filtering Funnels
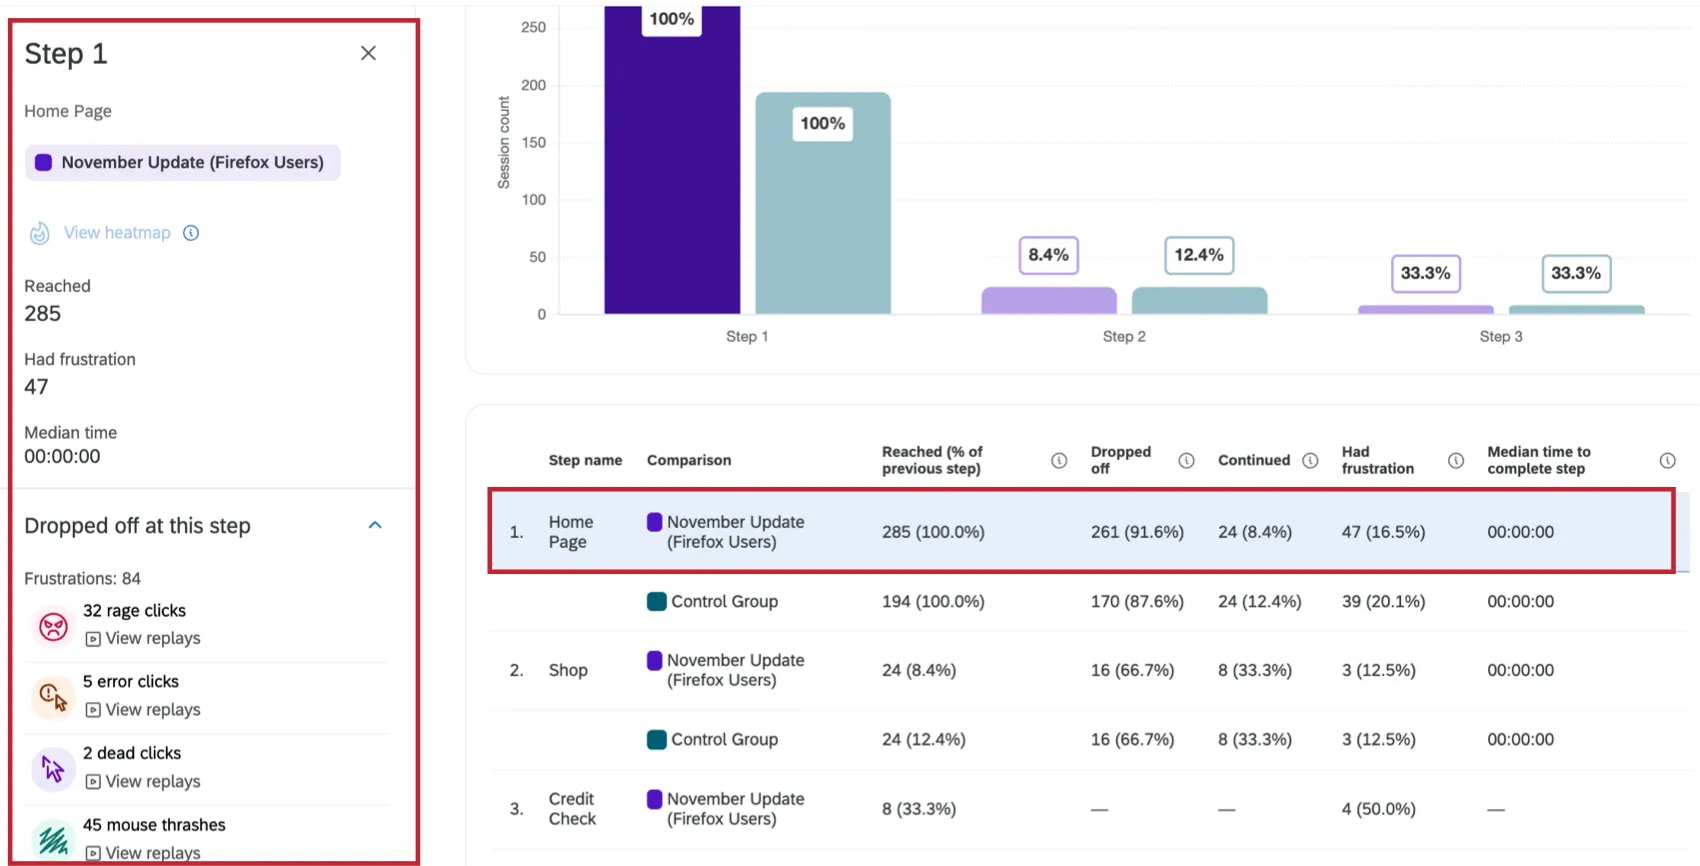
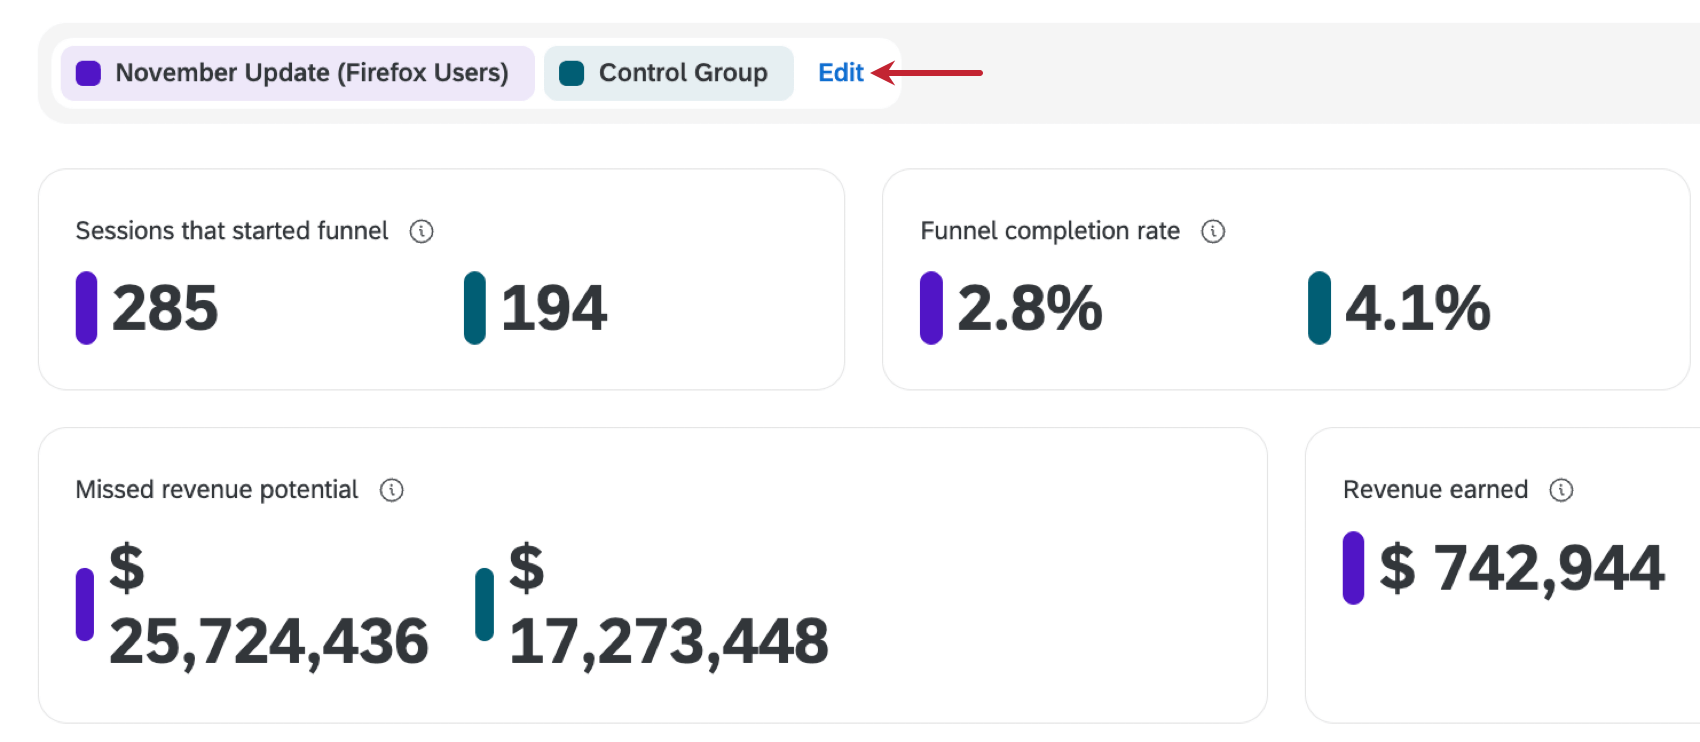
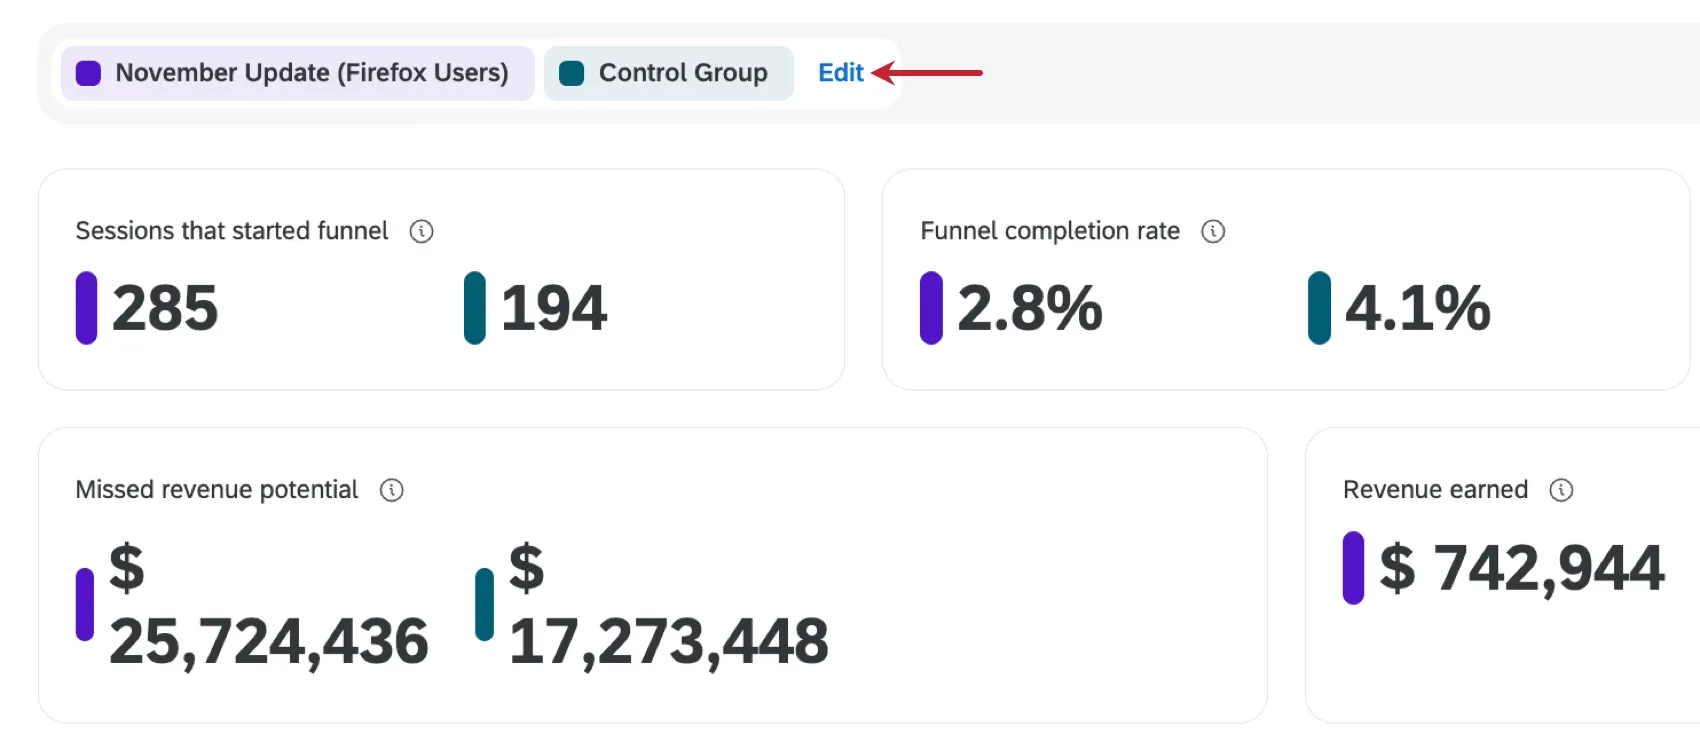
Adding a filter to your funnel is like creating a comparison, so you can view how different groups experienced your website. For example, in the images below, filters have been added to compare a Control Group of users to a group of Firefox Users that saw the November update to the website.
By default, funnels have a default filter set to the last 7 days. Click Edit next to the filter to add a new filter or modify an existing filter.
Click Add to add additional fields to the filter, and click Create new filter to create an entirely new filter.
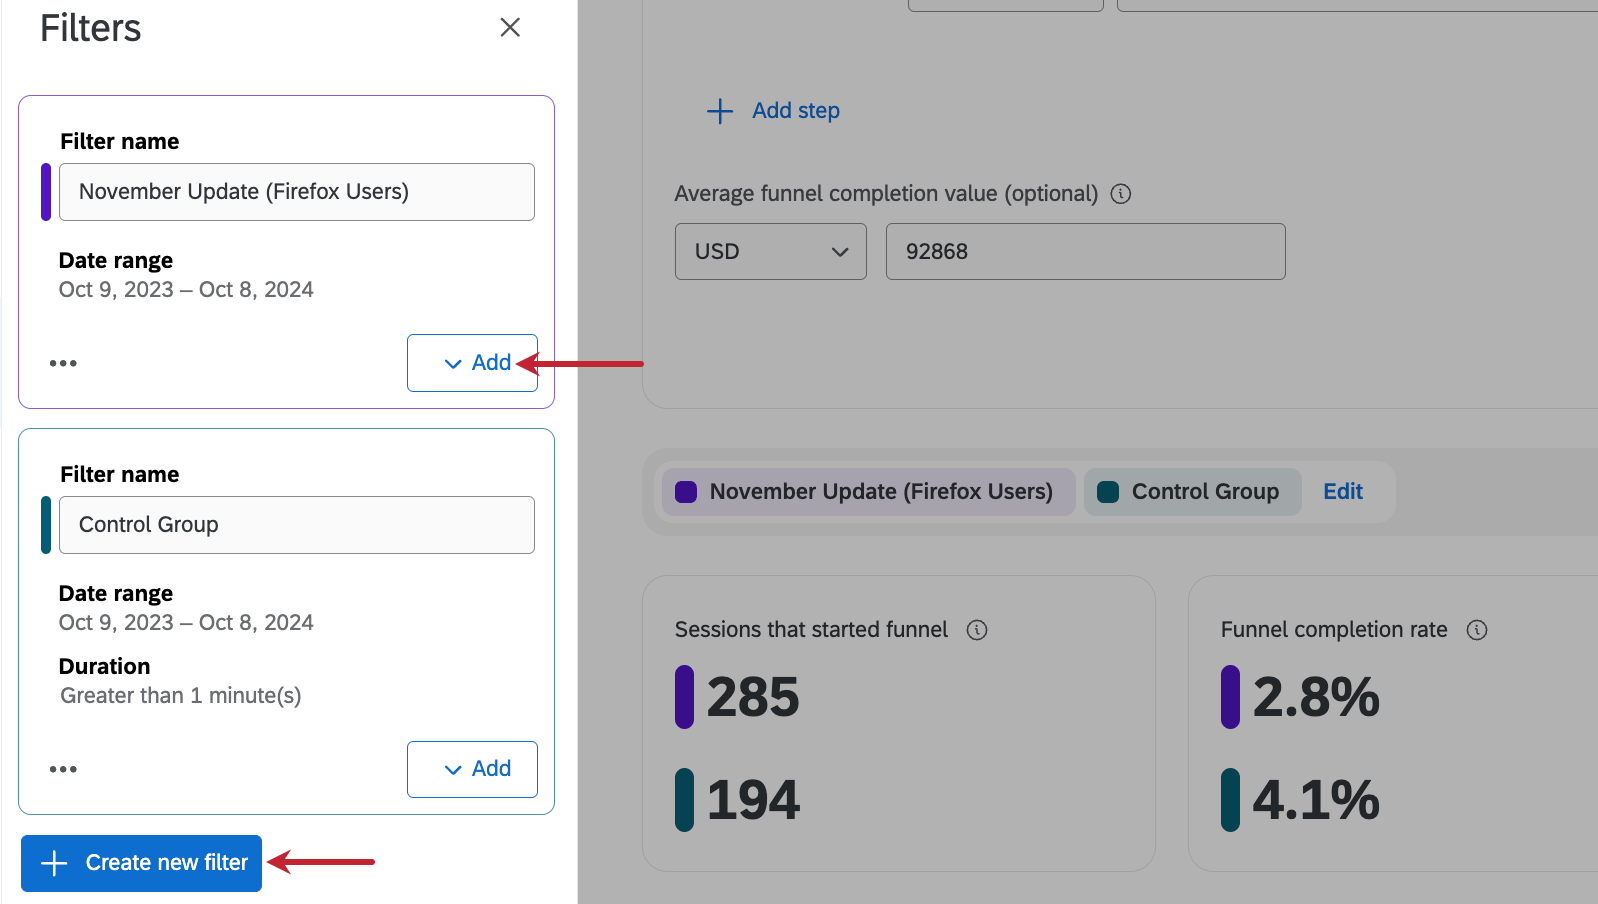

That's great! Thank you for your feedback!
Thank you for your feedback!