Journey Sessions, Outcomes, & Statuses
About Journey Sessions, Outcomes, and Statuses
A session is a traveler’s voyage along a journey. Journey sessions have a specific start point and end point which are usually triggered by certain events. The session tracks the traveler’s activities from when they enter the journey to when they accomplish a specific journey outcome. A given traveler can only have 1 active session at a time for a journey. When building your journey, you can choose when a journey session should end or restart.
Journey outcomes are the different possible results of your journey. They can be either positive or negative, which you can determine by setting a status.
Journey Sessions
A journey session begins when a traveler enters a journey and enters a milestone without already having an existing session. The journey session can end in 2 different ways:
- The traveler can meet a certain outcome and status which ends the journey session. See Setting Journey Outcomes & Statuses for a guide on applying outcomes to your journey.
- The traveler re-enters a milestone that’s been designated as a restart milestone, setting their previous session to “Incomplete” and starting a new session. See Milestone Customization for more information about this method.
Journey sessions are displayed in your journey paths diagram.
Setting Journey Outcomes and Statuses
To end a traveler’s session, you must add an outcome and status to at least one journey milestone.
An outcome describes the business objective that the traveler reached (e.g., “Onboarded,” “Cart Abandoned,” or “Timeout”). You should make sure to include undesired business objectives in addition to desired ones in your journey so that you can capture the different possible customer experiences.
A status describes if the reached outcome is positive or negative. A status should always be paired with an outcome. Positive outcomes are assigned “Success” while negative outcomes are assigned “Failure.”
To add an outcome and status:
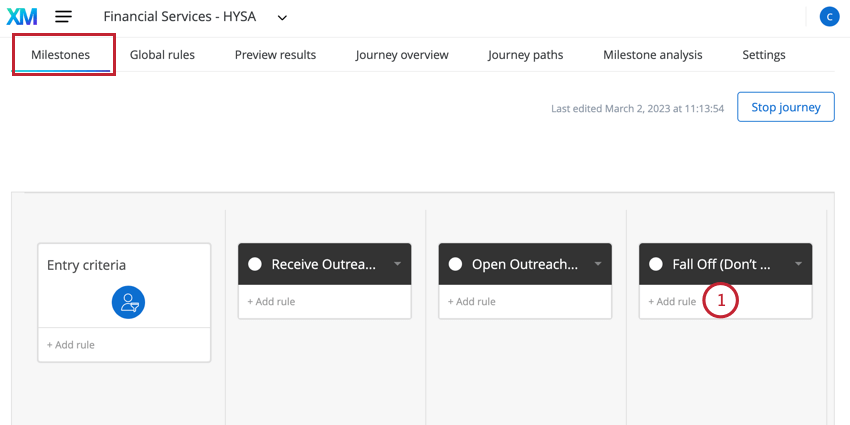
- In the Milestones tab, click Add rule on the milestone where you want to add an outcome and status.
- Give your rule a name.
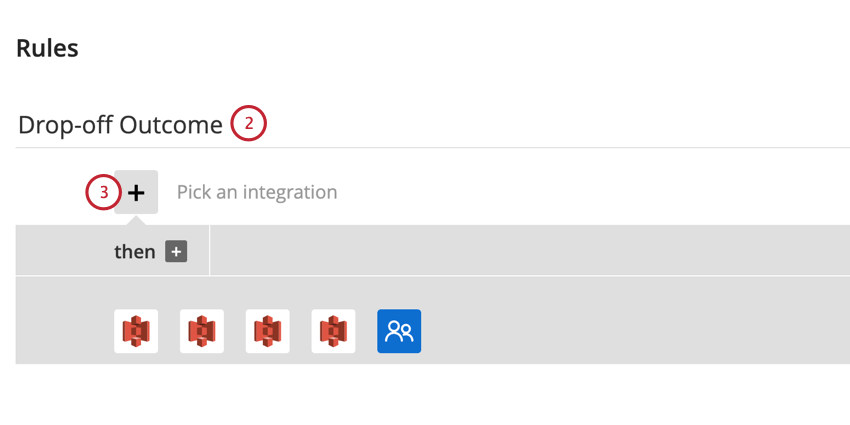
- Click the plus sign ( + ).
- Build the “if” statement of your rule. This logic determines under what conditions the outcome and status are set (e.g., if the traveler spends a certain amount of time in the milestone, or if the traveler files multiple support tickets within a certain time window). See Building Rules for more information.
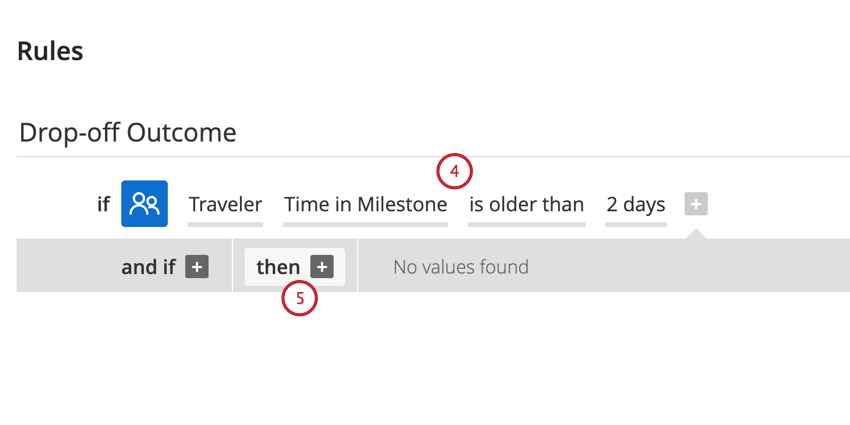 Example: In the above screenshot, we use the “Time in Milestone” field to build our “if” statement. This is a very common condition for capturing undesired outcomes where the traveler becomes stuck and drops off before reaching a desired outcome.
 - Click then +.
- For the “then” statement we want to save a traveler outcome. For the integration, choose Traveler.
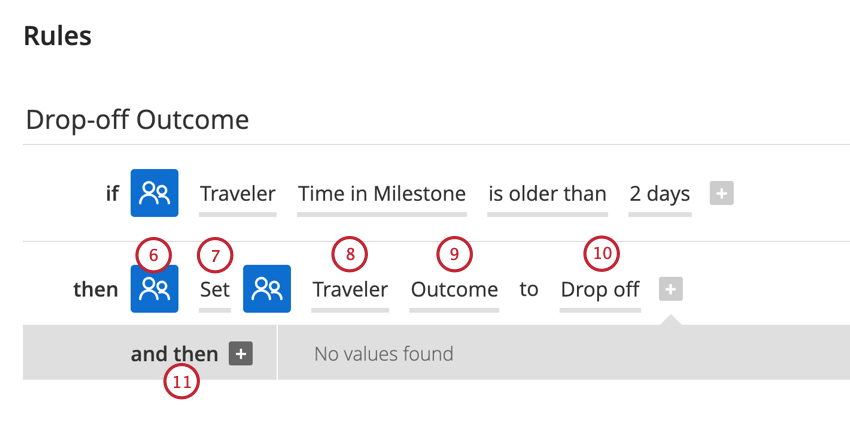
- Select Set.
- Choose Traveler again.
- Select Outcome.
- Type the business outcome.
- Click and then +.
- For this “then” statement, we are saving a traveler status. Repeat steps 6-9 to add logic for saving traveler data.
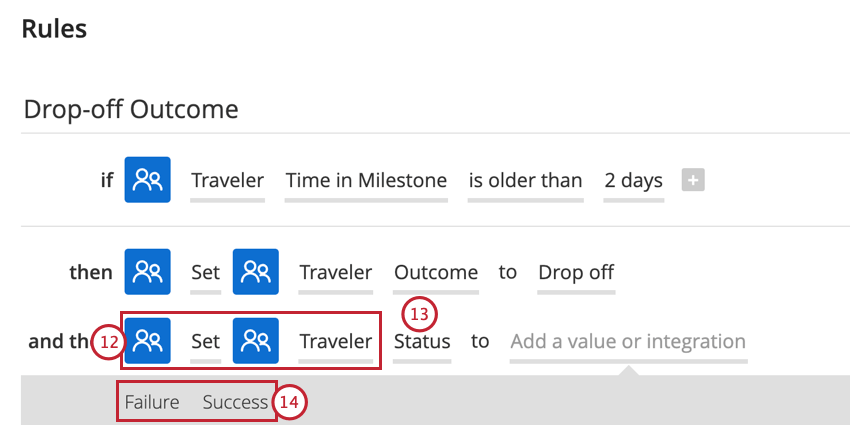
- For the traveler data field, select Status.
- Choose either Success or Failure depending on if the business outcome is positive or negative.
- Click Save.
Once travelers start moving along your journey and reaching different outcomes, you can view the outcomes and statuses by going to the Journey overview tab. See Reporting on Journey Outcomes & Actions for more information.