Advanced Maps
About Advanced Maps
Advanced maps are used when you need to map the subject, contact, and event schemas using different join identifiers in a single map. For example, let’s say you run an online business where customers can contact you 2 different ways: logging in with their account online, or calling in to a call center. You want to create a journey that understands the customer’s experience when trying to resolve an issue, which could involve one or both contact methods, which are represented by different event schemas. In each schema, the subject is different (for example, Web_Account for the online events, and PhoneVisit_ID for the phone events). You can use an advanced map to join the events from these multiple sources into one single map to use in your journey
Creating an Advanced Map
To create an advanced map, you will create multiple maps and then join them together by modifying the maps’ JSON files. The steps below walk through this process.
- Follow the instructions on the creating maps page to create your maps. In general, your maps should follow the below structures:
- 1 simple map which joins the contact data to an event schema’s subject (primary entity).
- 1 simple map which joins the contact data to a different subject from a different event’s schema.
- Let’s take a look at the first simple map. In this map, various subject fields are mapped to contact fields that are ingested from an S3 import.
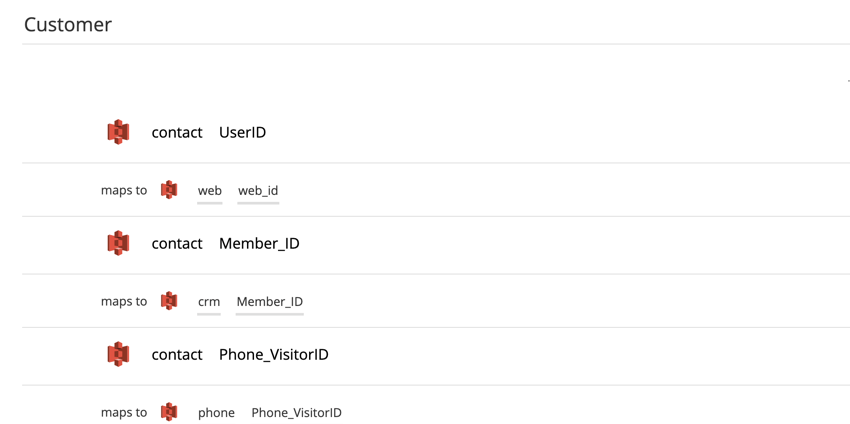
- We’ve also created a second simple map that maps subject data from a different event schema.
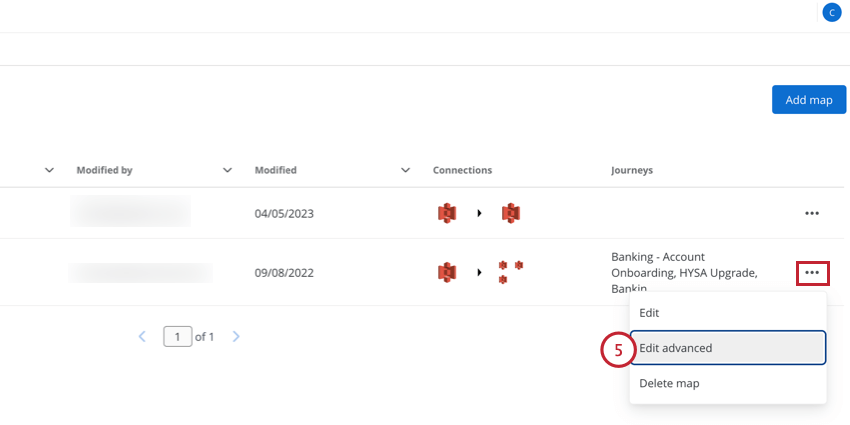
- Once you’ve created your maps, find your first map in the map list.
- Click the three dot menu next to the map and select Edit advanced.
- Click Copy code to copy the JSON to your clipboard.
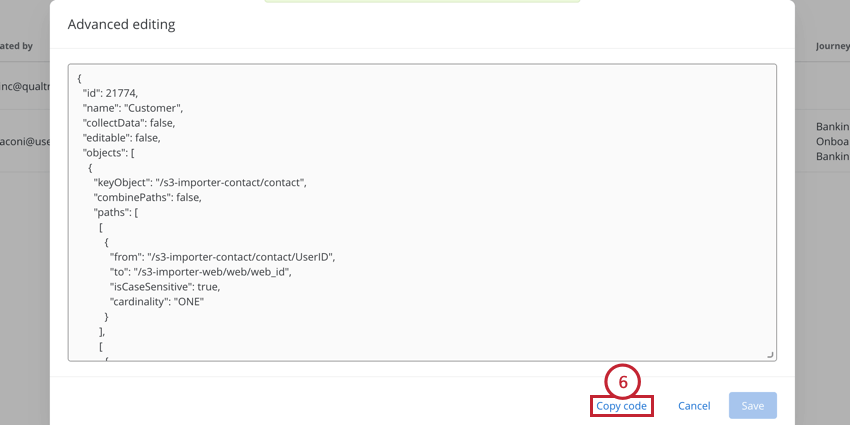
- Paste this code into a text editor on your computer or a free online JSON editor.
- Find your second created map in the list and repeat the above steps to copy its code into the same text editor.
- In the JSON file of your first map, find “paths” where the mapped systems are defined.
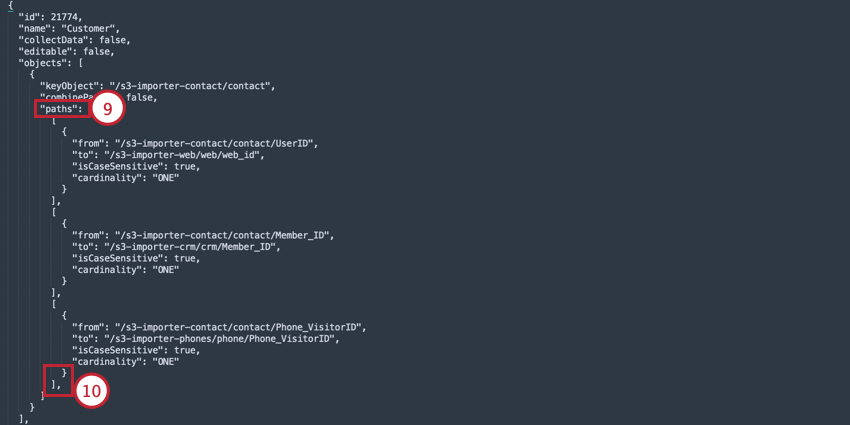
- Add a comma ( , ) after the closing square bracket ( ] ) of the last mapped system.
- With your cursor after the newly added comma, press Enter on your keyboard to add a new line.
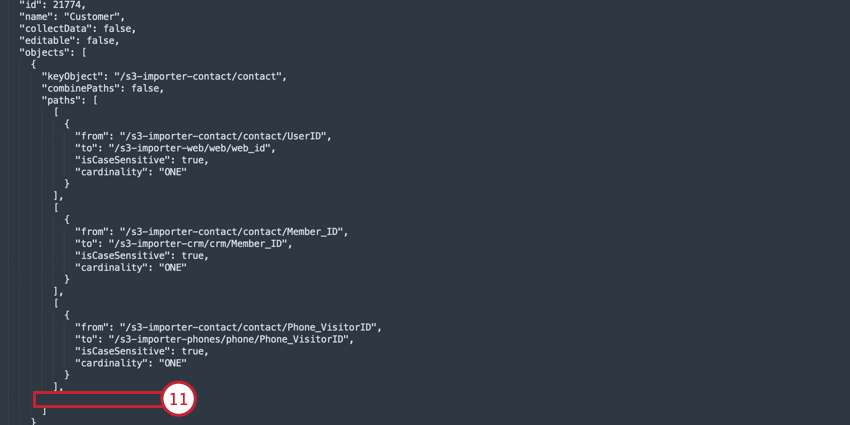
- Copy the mapping portion of the JSON file from your second map. Copy just the parts within the outer square brackets of the “paths” key (exclude the outer square bracket that appears on the same line as “paths” but include all the inner square and curly brackets that come after).
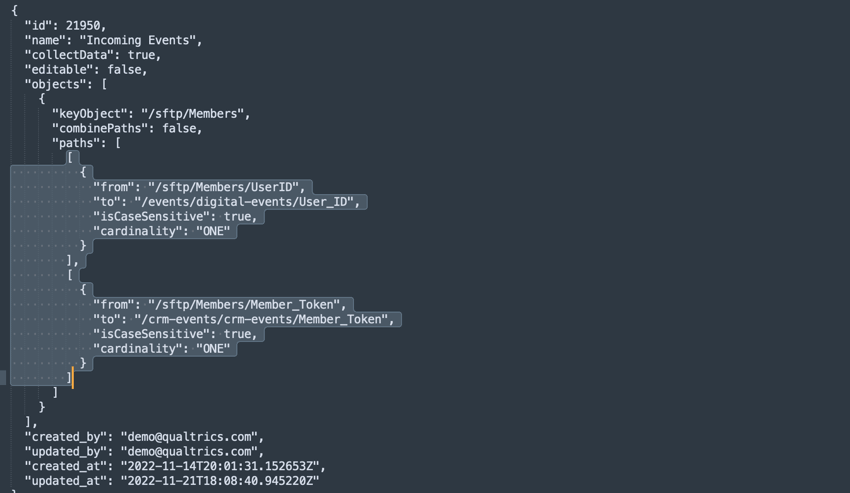
- Paste your copied JSON into the new line you added in step 11.
- In the Customer Journey Optimizer, find your first map you created.
- Click the three dot menu next to the map and select Edit advanced.
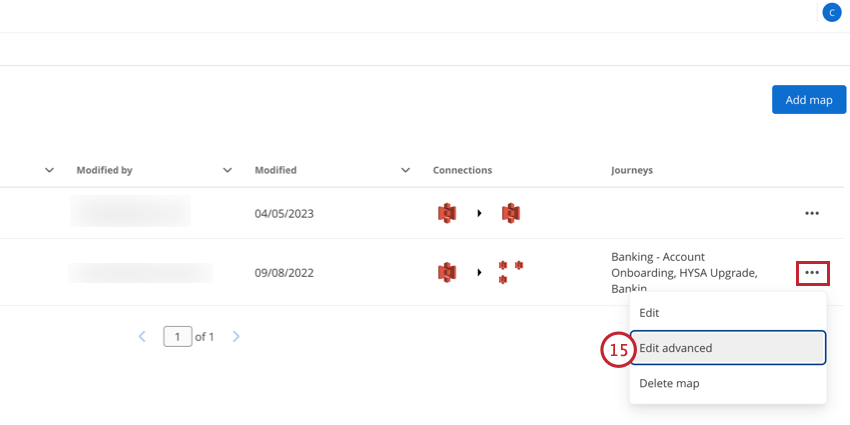
- Paste your modified JSON into the box.
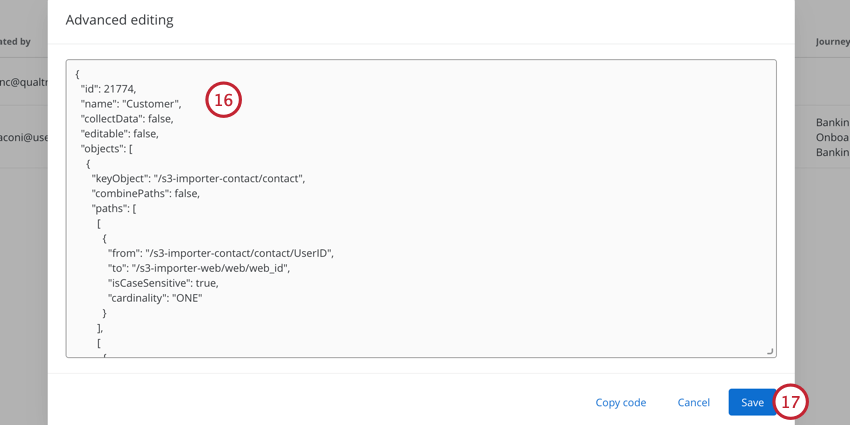
- Click Save.
- Open the map to verify that it looks as you’d expect.
- This step is optional. You can delete the other maps, as you don’t need them anymore.
Example: Combining JSON Files
This section is an example of combining map files using JSON code snippets.
First Map JSON
Below is the JSON for our first map which combines contact data to the subject schema:
{

"id": 21774,

"name": "Customer",

"collectData": false,

"editable": false,

"objects": [

{

"keyObject": "/s3-importer-contact/contact",

"combinePaths": false,

"paths": [

[

{

"from": "/s3-importer-contact/contact/UserID",

"to": "/s3-importer-web/web/web_id",

"isCaseSensitive": true,

"cardinality": "ONE"

}

],

[

{

"from": "/s3-importer-contact/contact/Member_ID",

"to": "/s3-importer-crm/crm/Member_ID",

"isCaseSensitive": true,

"cardinality": "ONE"

}

],

[

{

"from": "/s3-importer-contact/contact/Phone_VisitorID",

"to": "/s3-importer-phones/phone/Phone_VisitorID",

"isCaseSensitive": true,

"cardinality": "ONE"

}

]

]

}

],

"created_by": "demo@qualtrics.com",

"updated_by": "demo@qualtrics.com",

"created_at": "2022-08-24T16:42:53.570221Z",

"updated_at": "2022-09-08T20:14:33.534431Z"

}
Second Map JSON
Below is the JSON for the second map, which maps event data to the subject:
{

"id": 21950,

"name": "Incoming Events",

"collectData": true,

"editable": false,

"objects": [

{

"keyObject": "/sftp/Members",

"combinePaths": false,

"paths": [

[

{

"from": "/sftp/Members/UserID",

"to": "/events/digital-events/User_ID",

"isCaseSensitive": true,

"cardinality": "ONE"

}

],

[

{

"from": "/sftp/Members/Member_Token",

"to": "/crm-events/crm-events/Member_Token",

"isCaseSensitive": true,

"cardinality": "ONE"

}

]

]

}

],

"created_by": "demo@qualtrics.com",

"updated_by": "demo@qualtrics.com",

"created_at": "2022-11-14T20:01:31.152653Z",

"updated_at": "2022-11-21T18:08:40.945220Z"

}
Combined Map JSON
After combining the 2 JSON files using the above method, the JSON for the advanced map looks like this:
{

"id": 21774,

"name": "Customer",

"collectData": false,

"editable": false,

"objects": [

{

"keyObject": "/s3-importer-contact/contact",

"combinePaths": false,

"paths": [

[

{

"from": "/s3-importer-contact/contact/UserID",

"to": "/s3-importer-web/web/web_id",

"isCaseSensitive": true,

"cardinality": "ONE"

}

],

[

{

"from": "/s3-importer-contact/contact/Member_ID",

"to": "/s3-importer-crm/crm/Member_ID",

"isCaseSensitive": true,

"cardinality": "ONE"

}

],

[

{

"from": "/s3-importer-contact/contact/Phone_VisitorID",

"to": "/s3-importer-phones/phone/Phone_VisitorID",

"isCaseSensitive": true,

"cardinality": "ONE"

}

],

[

{

"from": "/sftp/Members/UserID",

"to": "/events/digital-events/User_ID",

"isCaseSensitive": true,

"cardinality": "ONE"

}

],

[

{

"from": "/sftp/Members/Member_Token",

"to": "/crm-events/crm-events/Member_Token",

"isCaseSensitive": true,

"cardinality": "ONE"

}

]

]

}

],

"created_by": "demo@qualtrics.com",

"updated_by": "demo@qualtrics.com",

"created_at": "2022-08-24T16:42:53.570221Z",

"updated_at": "2022-09-08T20:14:33.534431Z"

}