
Using Location Data in Dashboards
What's on this page
About Using Location Data in Dashboards
You can use location data in your dashboards by joining it with your project data. Joining the data ensures that all the location data you need will be combined with the survey responses or web reviews you want to report on. What’s more, you only have to map one identifying field to link all of your location data together.
Attention: Each location data source (i.e., an individual directory) can only be added to a limit of 8 dashboards. After that, you cannot copy those dashboards / datasets or create new ones with that same source.
Choosing an Identifying Location Field
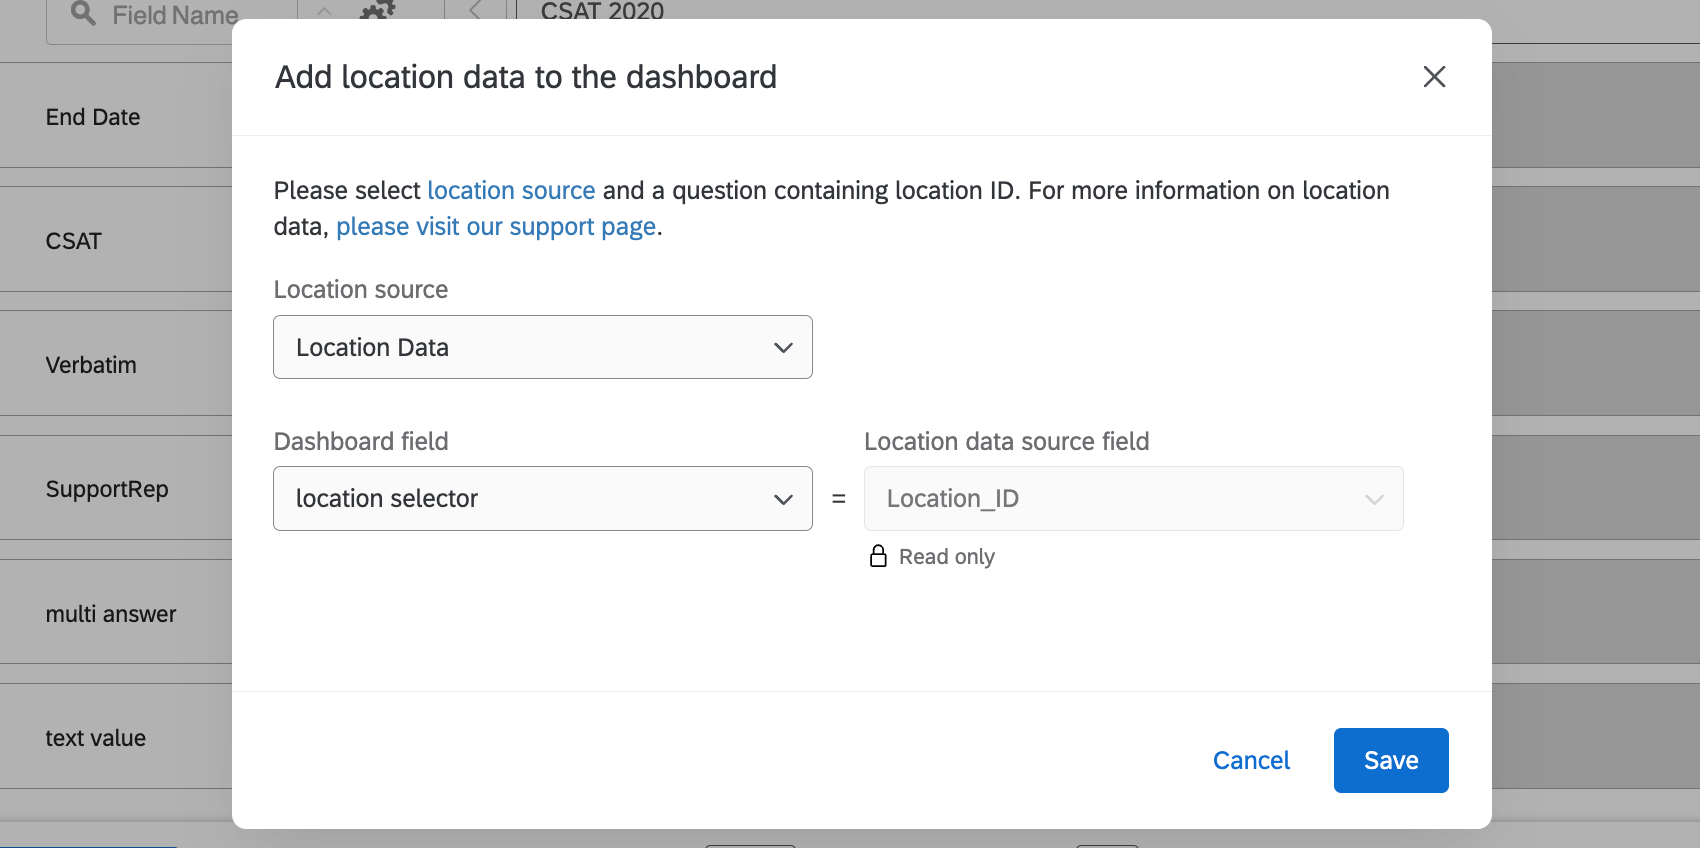
When you create a join, you need some way of identifying each specific location so you can match its additional info to a relevant survey response. This identifying field is crucial to linking this information together, and is called a join key. This join key can vary based on what information to want to combine, but it must always be an ID that’s unique for each location.
Common location join keys include the location ID and Google Place IDs. If you have an internal ID for locations at your company, you can also try the LocationExternalReference. See all supported location fields.
Example: You upload your locations to a location directory. In your survey, you use branch logic to assign location IDs to each response. You would use your location ID field as the join key.
Example: You’ve created a location selector question and a location directory. You join the location selector and the location ID.
Example: Your survey solicits for Google reviews. You want to combine this data with a reputation management project where you’ve connected to Google. You join using the Google Places ID.
Matching Fields in Each Data Source
Qualtrics offers a variety of ways to collect feedback on different locations. To make the most of that information, you’ll want to combine it into one dataset together. To help with that process, this table shows some of the similar fields your possible sources might share.
On the last row of this table, we show where you can store this information in your survey if it isn’t included by default and you don’t want to use the specialized location or review questions. Keep in mind that embedded data and survey questions are customized by you, and may vary in name and type.
| Location ID | Google Place ID | Review Text | Reviewer Name | |
|---|---|---|---|---|
| Reputation management project (any version) | subjectReferenceId | N/A | Content | authorName |
| Solicit reviews survey | Not included by default | Embedded data (see recommended steps) | Not included by default | Embedded data or form field question |
| Location selector survey | Location selector question | Not included by default | Text entry question | Embedded data or form field question |
| Survey (other) | Embedded data | Embedded data | Text entry question | Embedded data or form field question |
| Location directory | _recordId | GooglePlaceID | N/A | N/A |
Qtip: With solicit reviews and location selector questions, you can use supplemental data sources to pull in location information not included by default. Not only is this a great way to expand the location data in your survey, but if you do this before you collect responses, you won’t have to join location data in the dashboard dataset!
Configuring Location Data with a Data Mapper
In this section, we’ll show how you can use a data mapper to set up your location data.
Mapping Location Data to a Dashboard

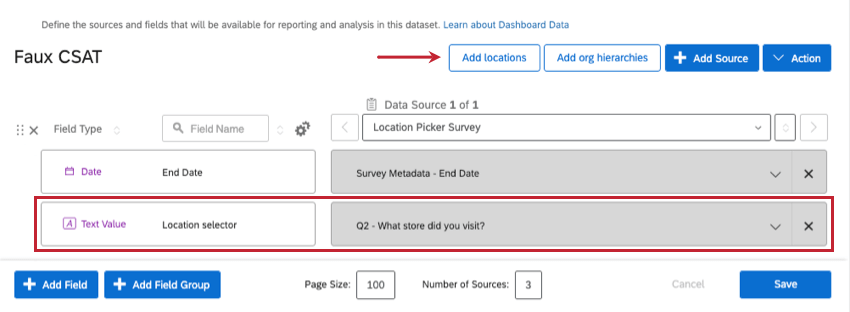
- Location selector question: Choose the location selector question.
- Search the web reputation management: The field where you store your store’s code. For example, a Google Place ID.
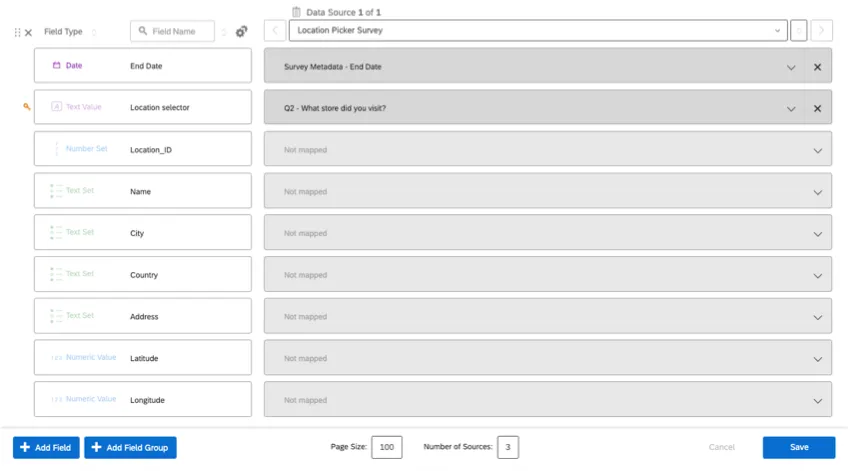
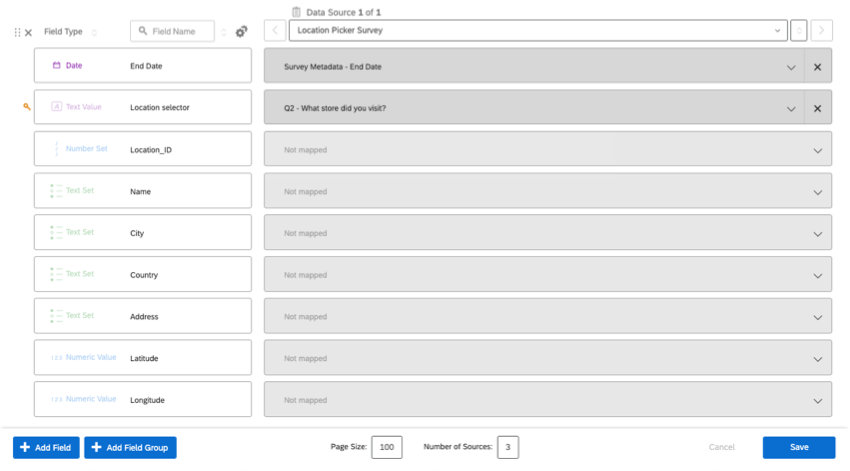
Once you add the location identifier, all location fields will be automatically mapped to the dashboard.
Warning: Do not try to map these fields yourself. Although the fields say “not mapped,” the directory data will be pulled in automatically.
Editing the Dashboard Dataset
You can change your location setup by clicking Add locations again.
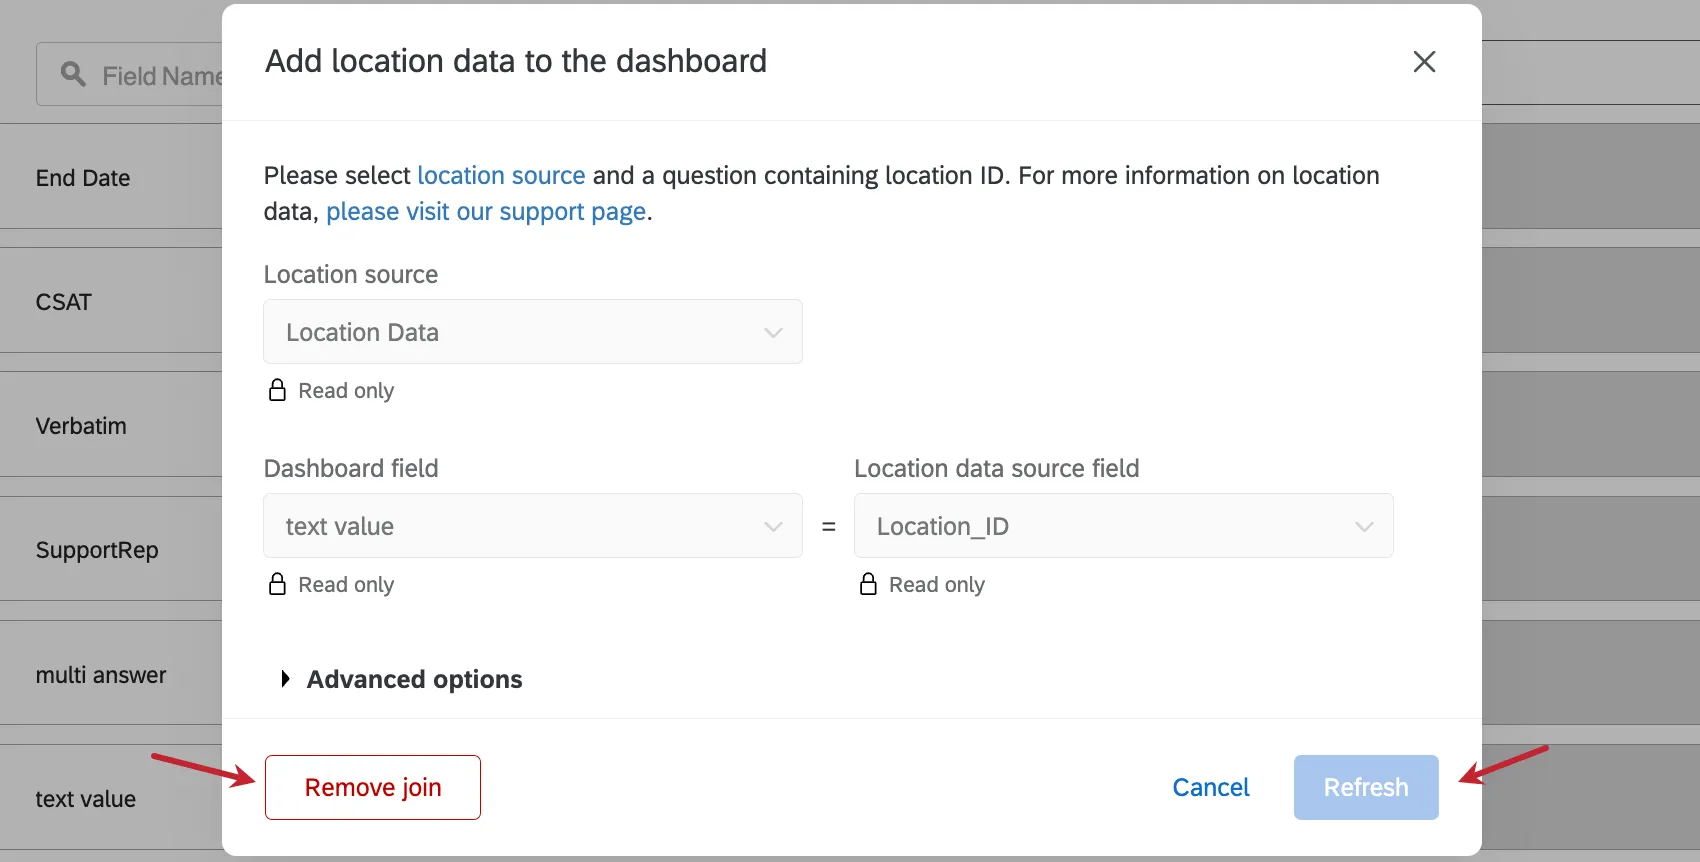
In the window that opens, you’ll have the following options:
- Remove join: Remove the location data. If you want to change the mapping to a different field, you must remove the existing join first.
- Refresh join: Click this button whenever you change the field type of location data or add new columns (e.g., adding an address field that wasn’t there before). You do not have to use this button every time you add a new location.
To edit the field types for your location data, open the imported data project that contains your location directory and go to the Data & Analysis tab. Within that tab you can edit your fields in the Field Editor. For instructions, see Data & Analysis in Imported Data Projects. After changing the field type, you’ll need to click Refresh within your dashboard.
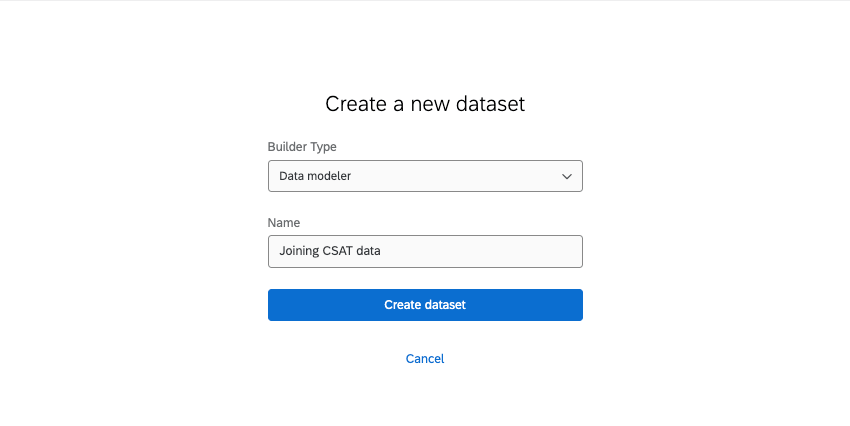
Configuring Location Data with a Data Modeler
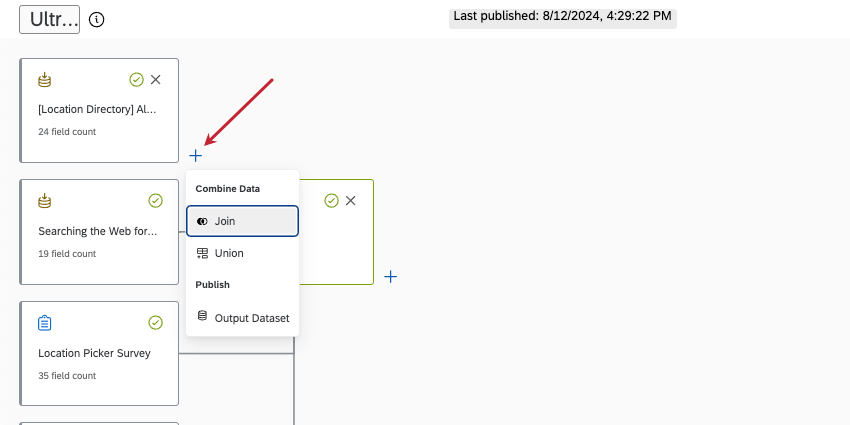
The benefit of a data modeler is that you can build multiple joins, even using different join keys to identify locations. Not only can you do everything you can do in the data mapper in the data modeler, but you can also build potentially bigger and more comprehensive datasets. In this section, we’ll discuss how to generally use the data modeler to combine location data from several sources.
Attention: Before you start to build data models, we recommend reading Understanding Left Outer Joins. This short example explains how data is combined in a join, and help you start to think about how you want to set up your own dataset.
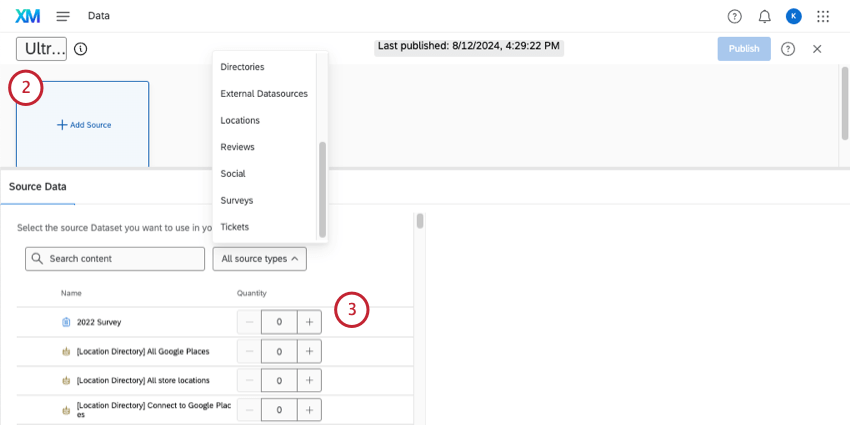
Qtip: You’ll find location directories under Locations. You can also add other sources as needed, such as contact directories, imported data projects, surveys, and reputation management projects.
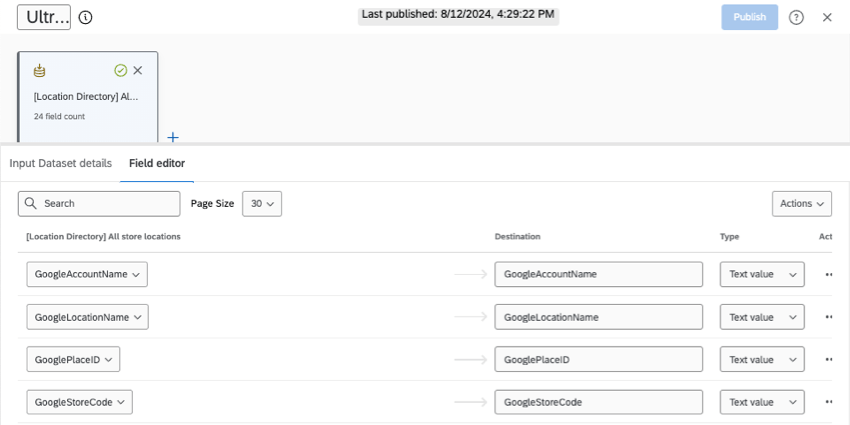

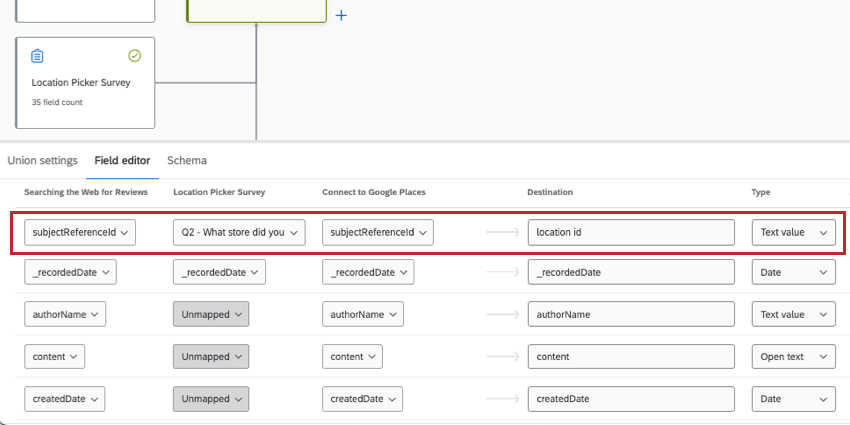
Qtip: Fields won’t always have the same names in each source. For example, the location ID is Location ID in location directories, but subjectReferenceId in reputation management projects. See our guide to matching fields.
Attention: Every source needs to have data for the join key you chose, or the join won’t work.
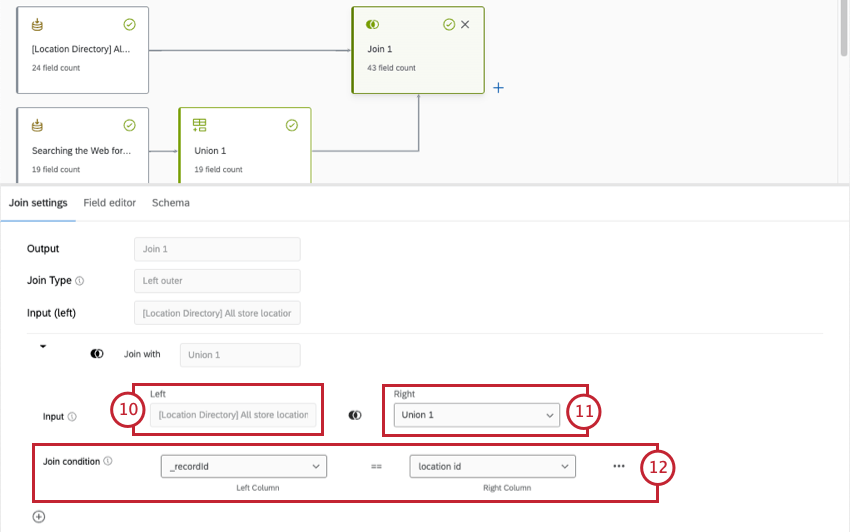
Qtip: In this case, “_recordId” and “location id” both contain Location ID data.
Qtip: Based on the features you’re using, your exact joins may vary. For example, this section shows several different examples with different join keys, like location ID and Google Place ID. If you have several sources to combine, it might not always be clear what sources to join in which order.
FAQs
What is a join?
What is a join?
That's great! Thank you for your feedback!
Thank you for your feedback!