-

Qualtrics Platform -

Customer Journey Optimizer -

XM Discover -

Qualtrics Social Connect
App Configuration Overview
About App Configuration
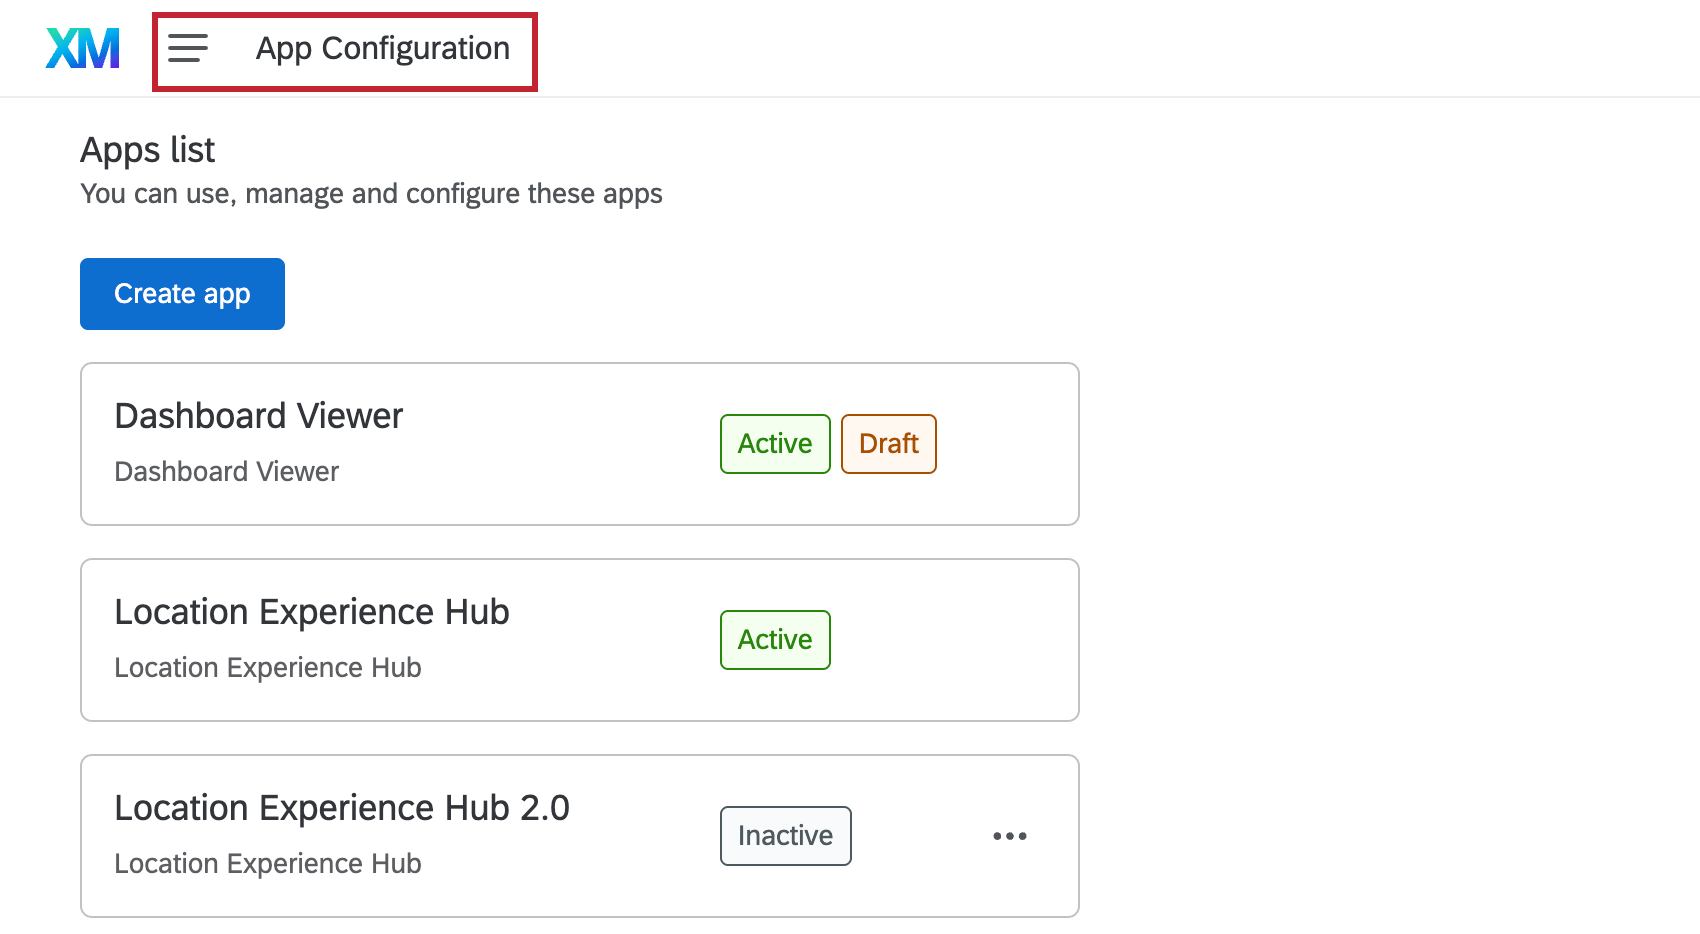
Apps allows users to view specified workspaces within Qualtrics. Within these workspaces they can view collections of specific data and insights. See Available Apps for a list of the app types that are currently available.
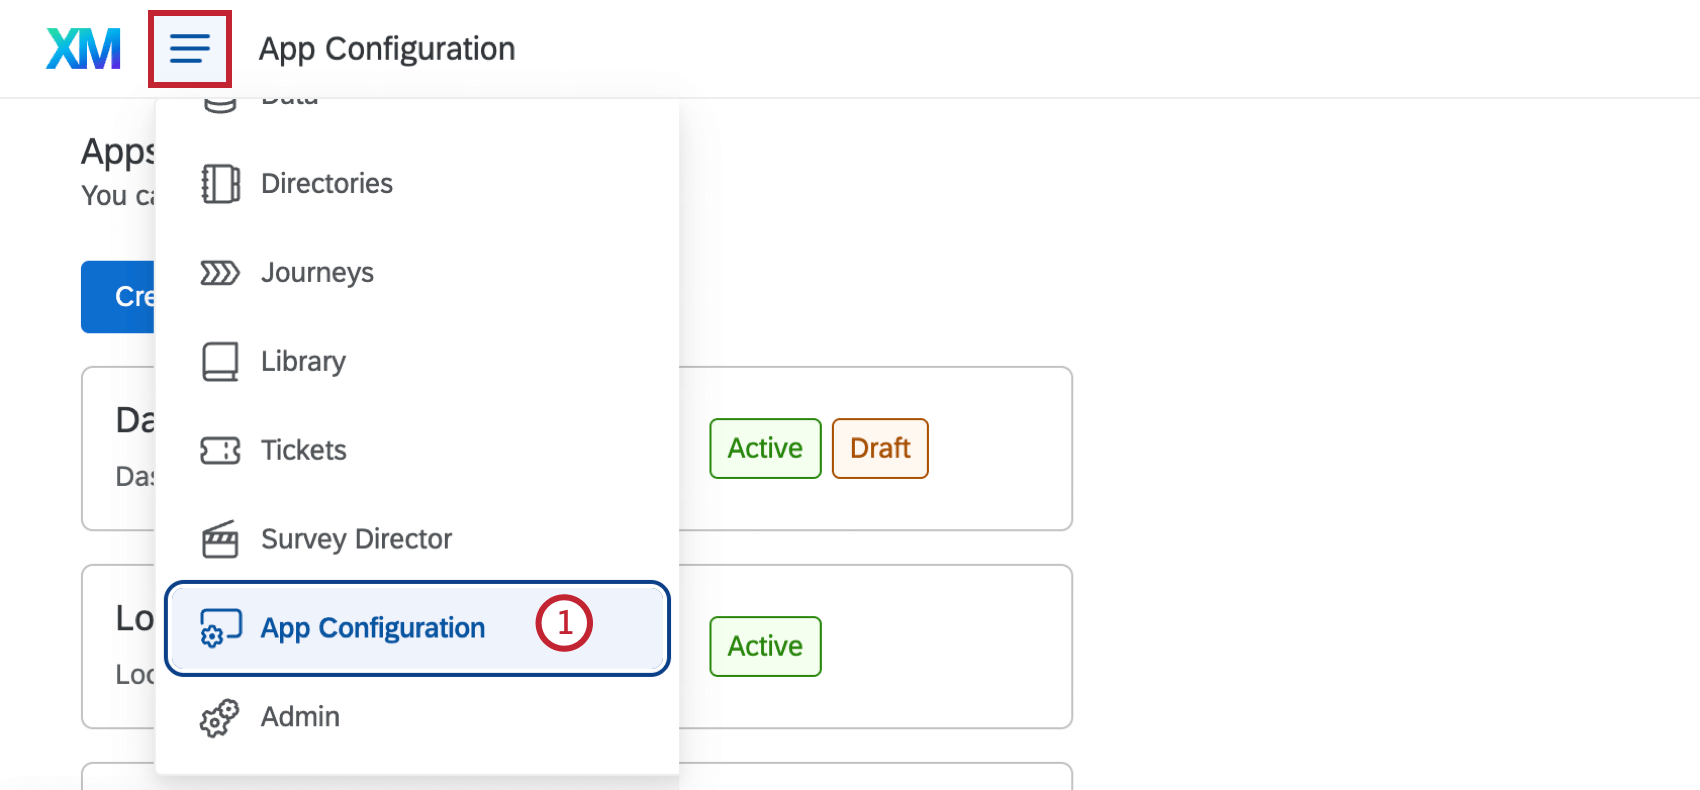
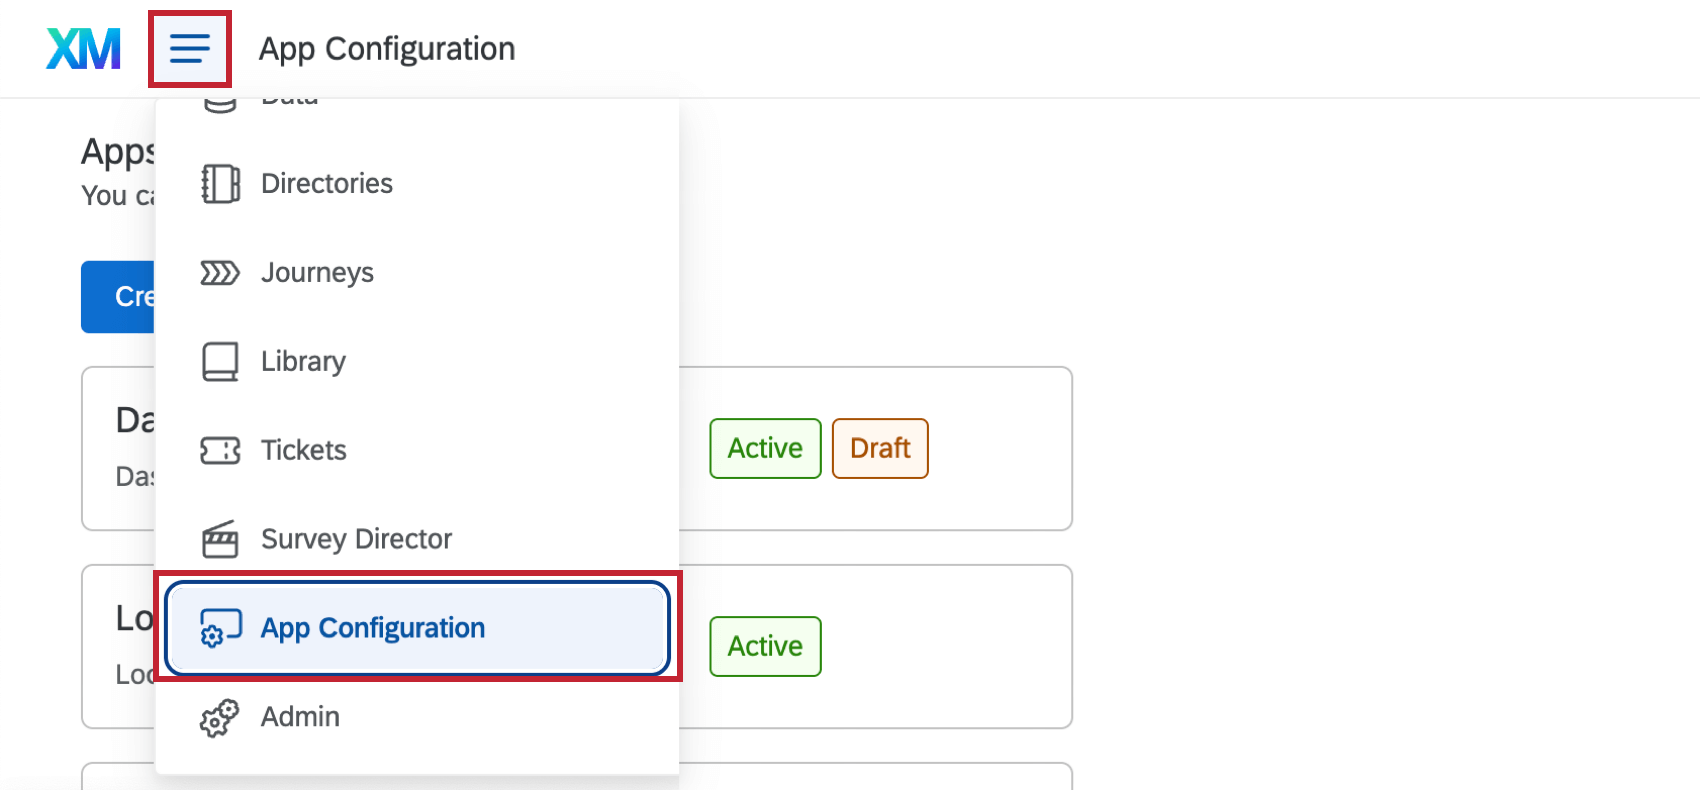
Brand Administrators, as well as some other user types, can configure and activate apps for their organization. Navigate to the App Configuration tab from the global navigation menu to view a list of apps you have access to configure.
Single Instance vs. Multiple Instance Apps
Apps that can have multiple instances created are called Multiple Instance apps. Creating multiple versions of the same app allows you to have different app configurations, and these apps can then be shared with different groups of users that may have unique needs.
Apps that can only have a single version are called Single Instance apps. These apps only allow for a single configuration, and administrators can not create new instances of them.
See the table in Available Apps for information on which apps can have single vs. multiple instances.
Available Apps
This table contains all the currently available app types. Click the relevant support page to learn more about each individual app.
| App Name | App Type |
| Dashboard Viewer | Single Instance |
| Location Experience Hub | Multiple Instance |
| Manager Assist | Single Instance |
| Participant Portal (360) | Single Instance |
| Research Hub | Single Instance |
Creating Apps
For apps that allow multiple instances, administrators can create new versions of the app within their brand. Follow the below steps to create a new instance of an app.
- Select App Configuration from the global navigation menu in the top left of your account.
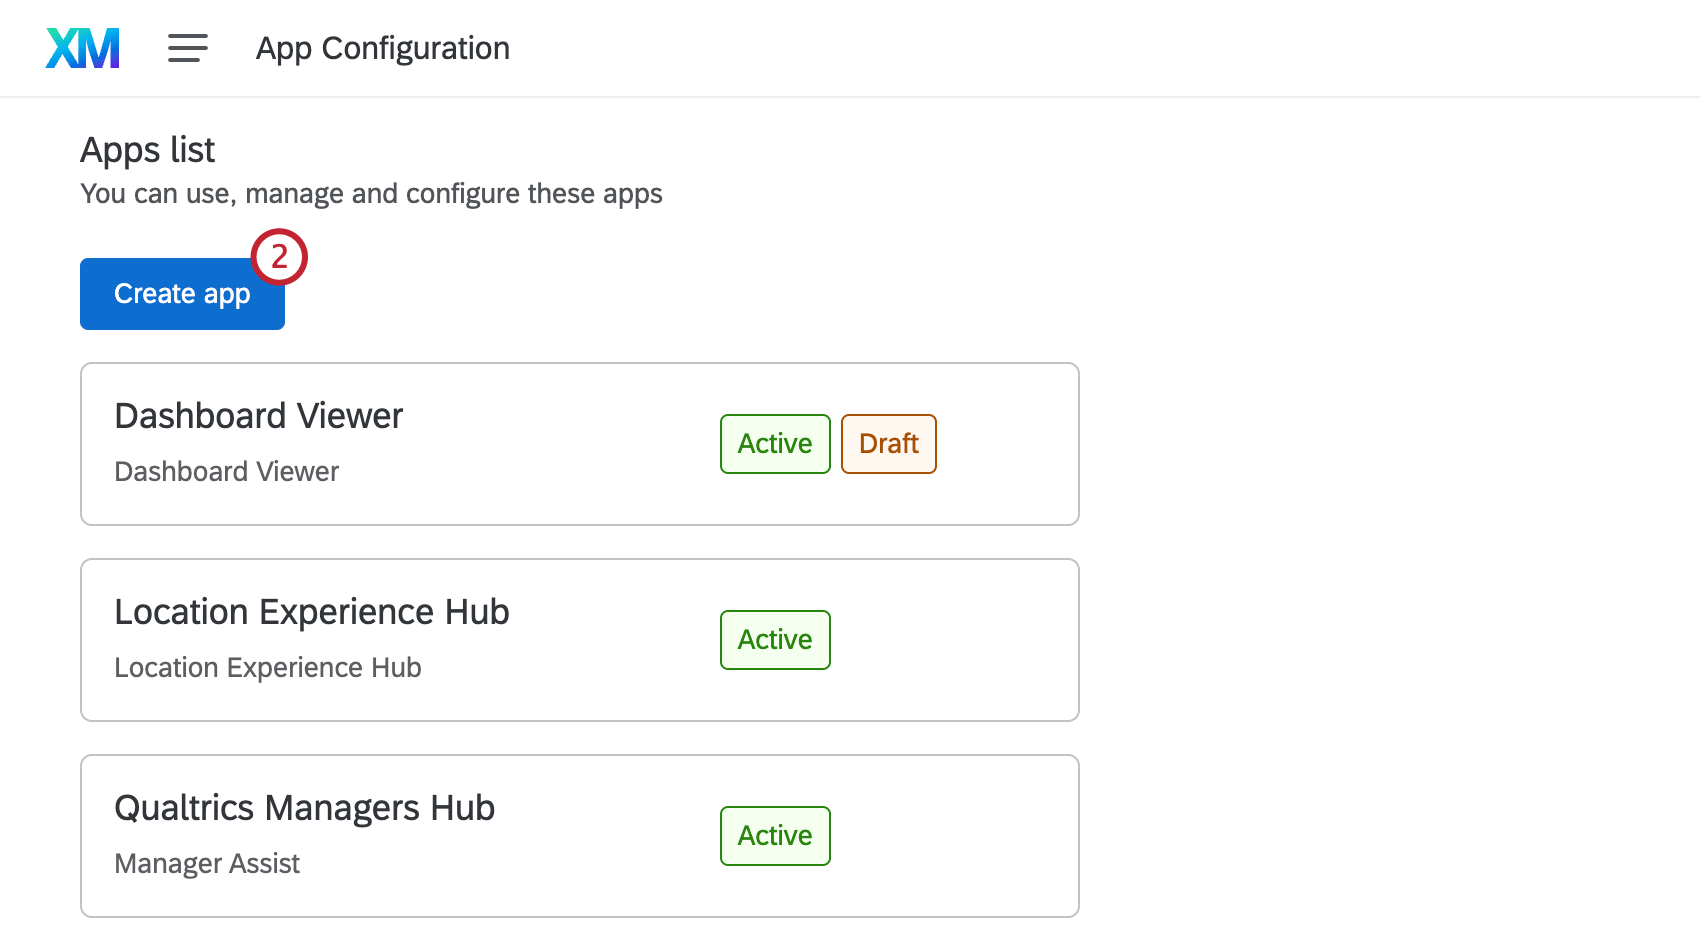
- Click Create app.
- Name your app.
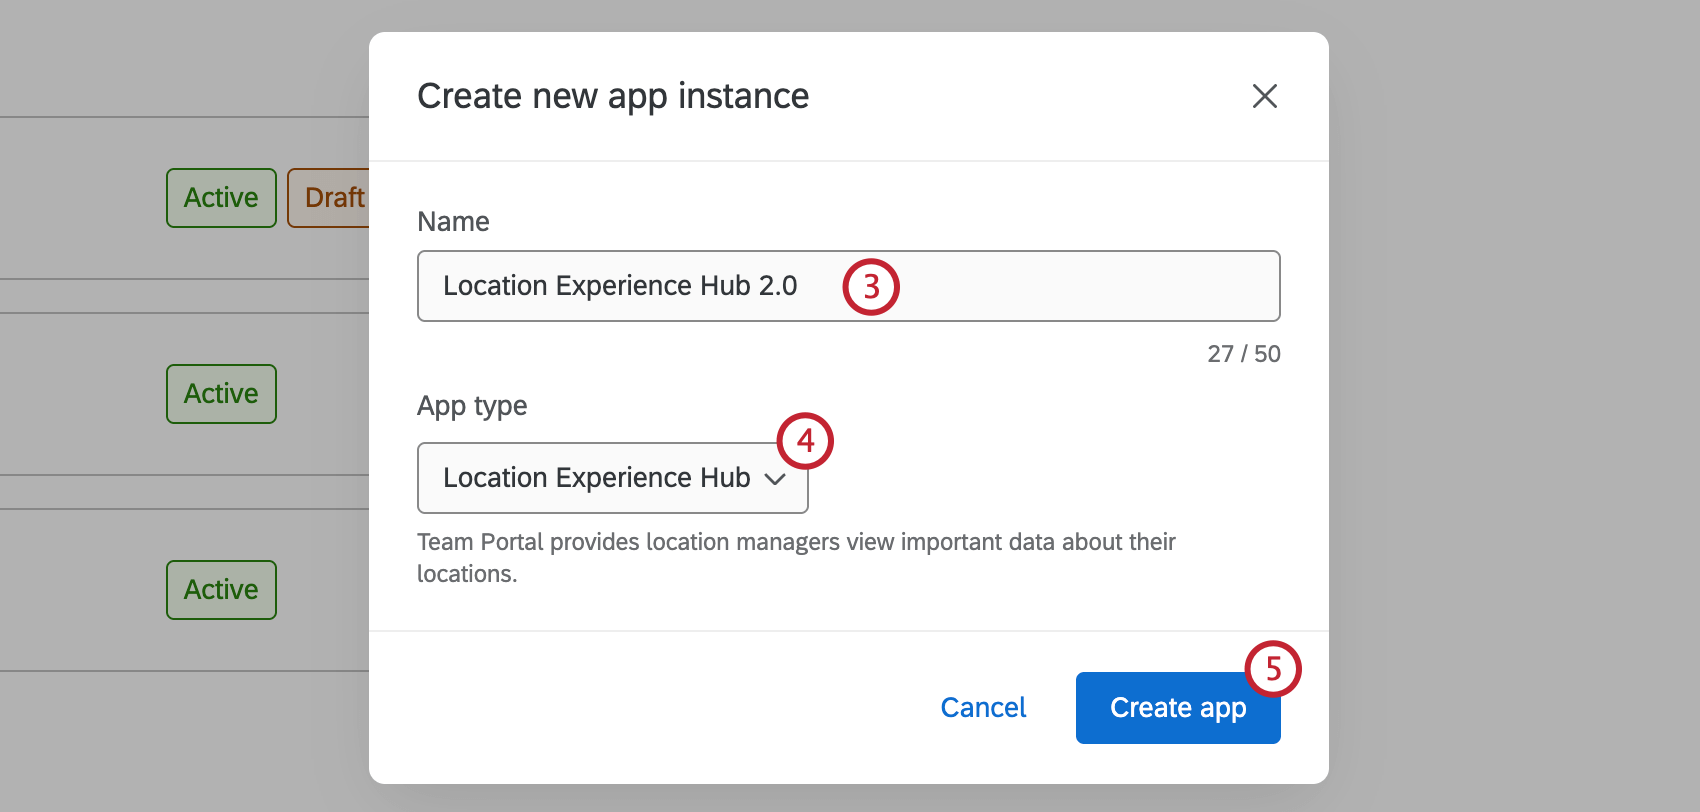
- Select the App type you want to create from the dropdown.
- Click Create app.
Once your app is created, you’ll be taken directly to the settings so you can configure your app. See Setting Up Apps for more information about configuring each app type.
You can also return to App configuration to view your newly created app in the apps list.
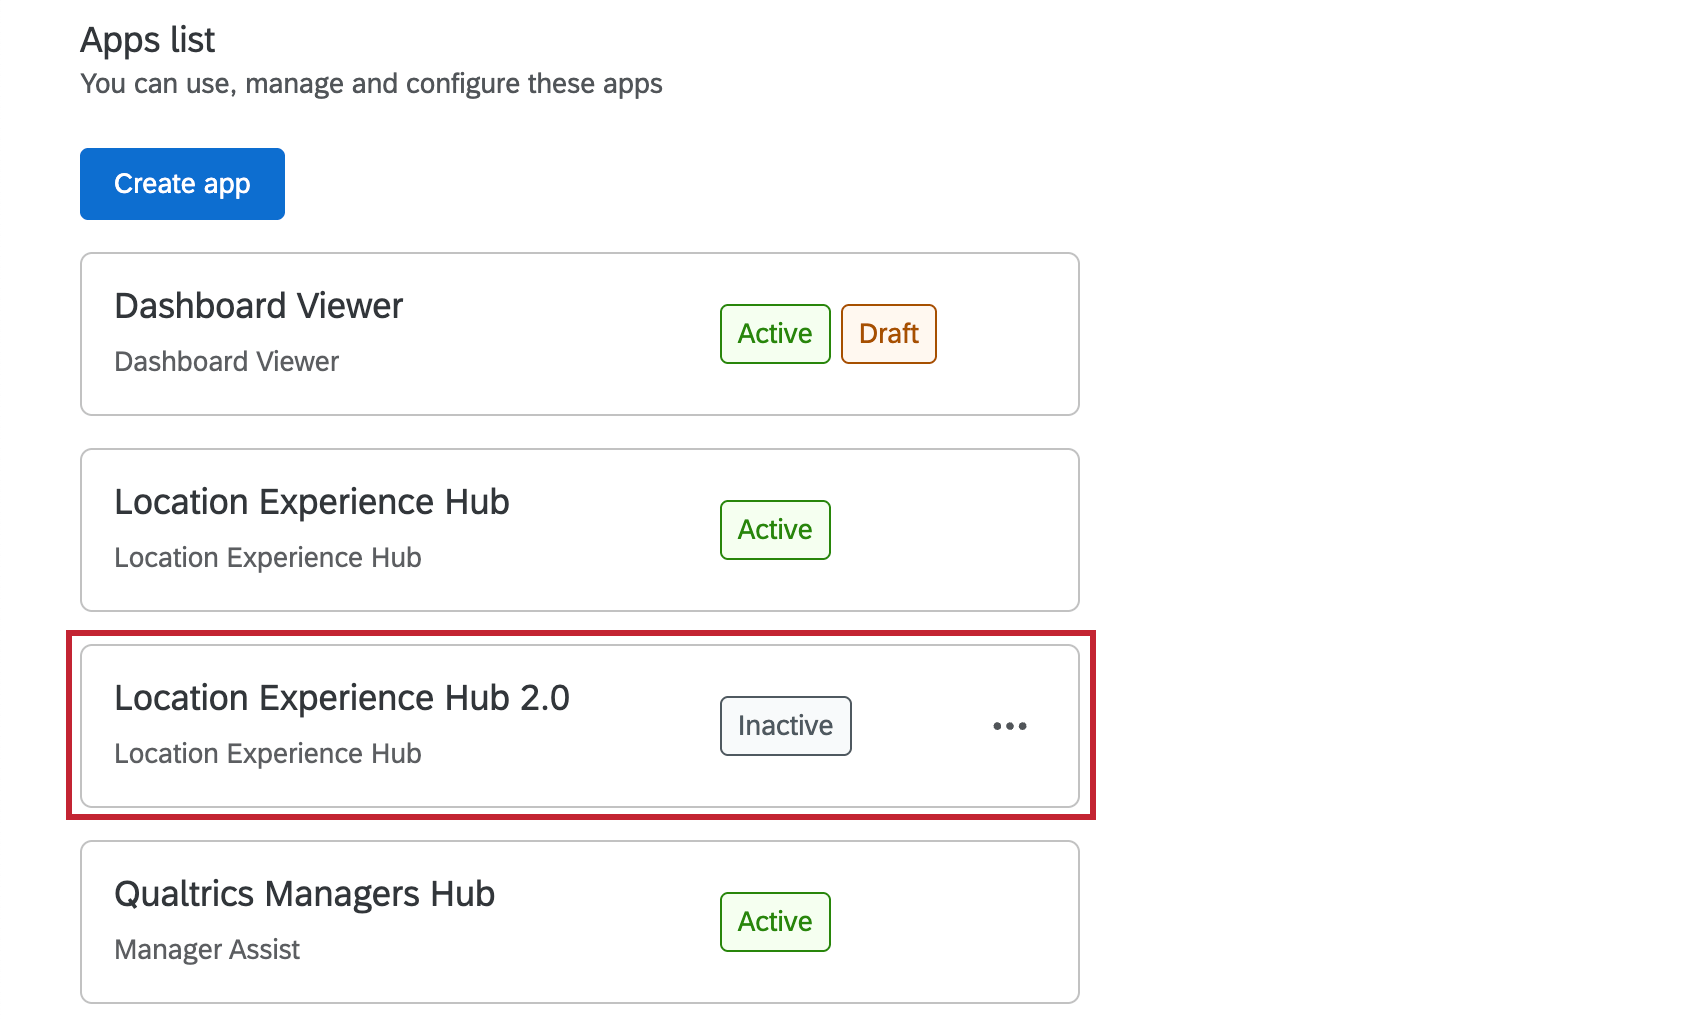
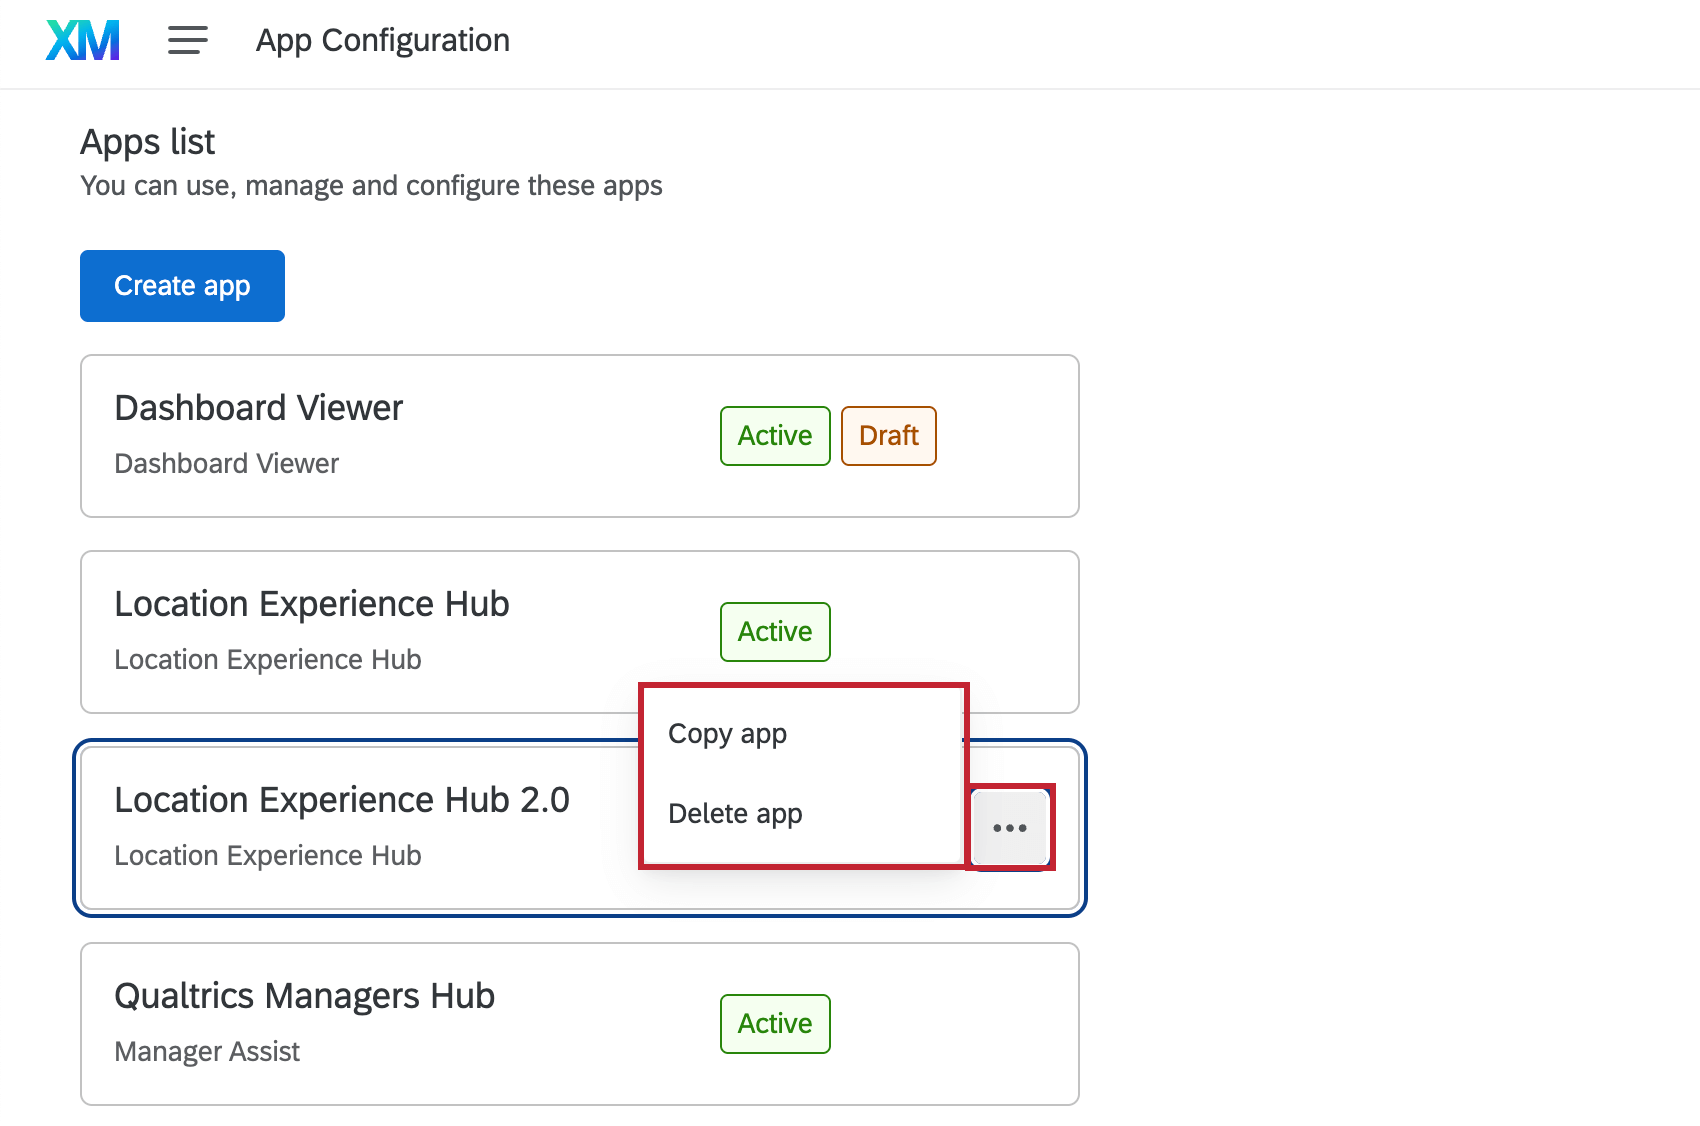
Copying and Deleting Apps
Within the App Configuration page, click the 3 horizontal dots next to an app for additional options. Click Copy app to create a copy of the app, or Delete app to delete the app.
Setting Up Apps
Once your app has been created, you can configure how it will appear to your users. Click the relevant support page below for more information on setting up each type of app:
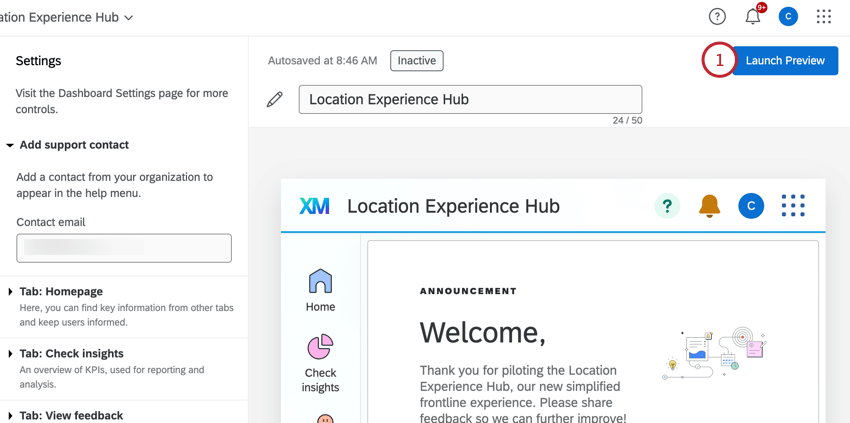
Previewing Apps
When you’ve finished configuring your app, you can enable a preview before the app is available for your whole organization. This preview will only be available to users with Manage App permission. See App Permissions for the relevant permission for each app type.
- Click Launch Preview within the app.
- Click Activate.
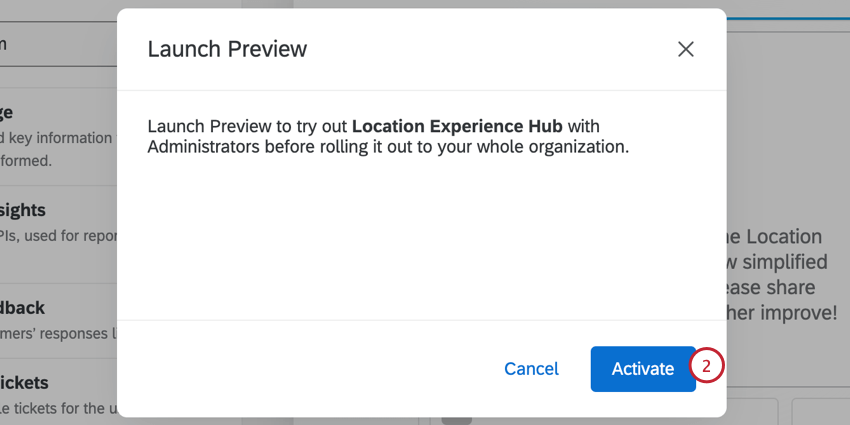
- Now that the preview is active, other users with the Manage App permission will be able to view the app by selecting it from the app switcher in the top right of their account. Any changes you make will be visible to these users. To enable the app for all users, see Activating Apps.
Activating Apps
After configuration, apps will be deactivated by default. After activating the app preview, you can activate the app for your organization. Note that it will only be visible to users with the permission to access the app. See App Permissions for the relevant permission for each app type:
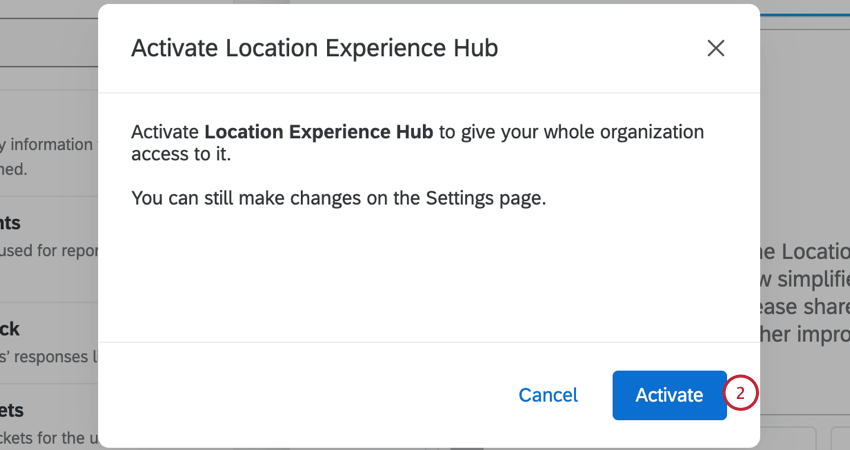
- Select Activate within the app.
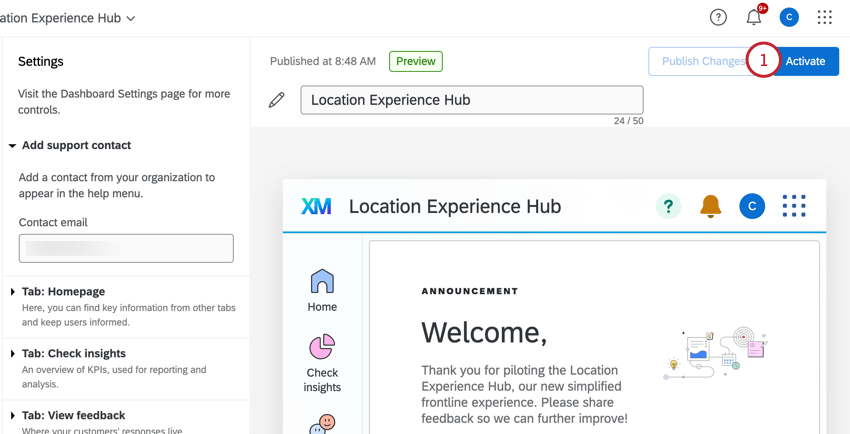
- Click Activate.
- Once the app is active, select Publish Changes to publish new changes to all users. Select Revert to published to go back to the last published version of the app.
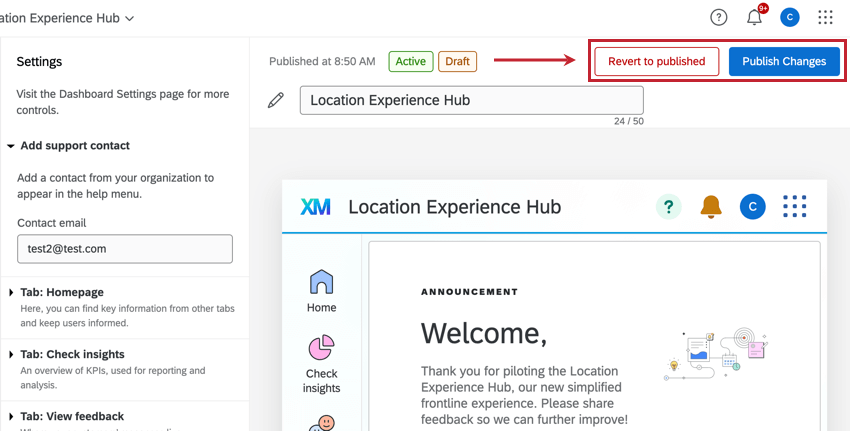 Qtip: Any changes you make will be autosaved, but they will not be live to users until you click Publish Changes.
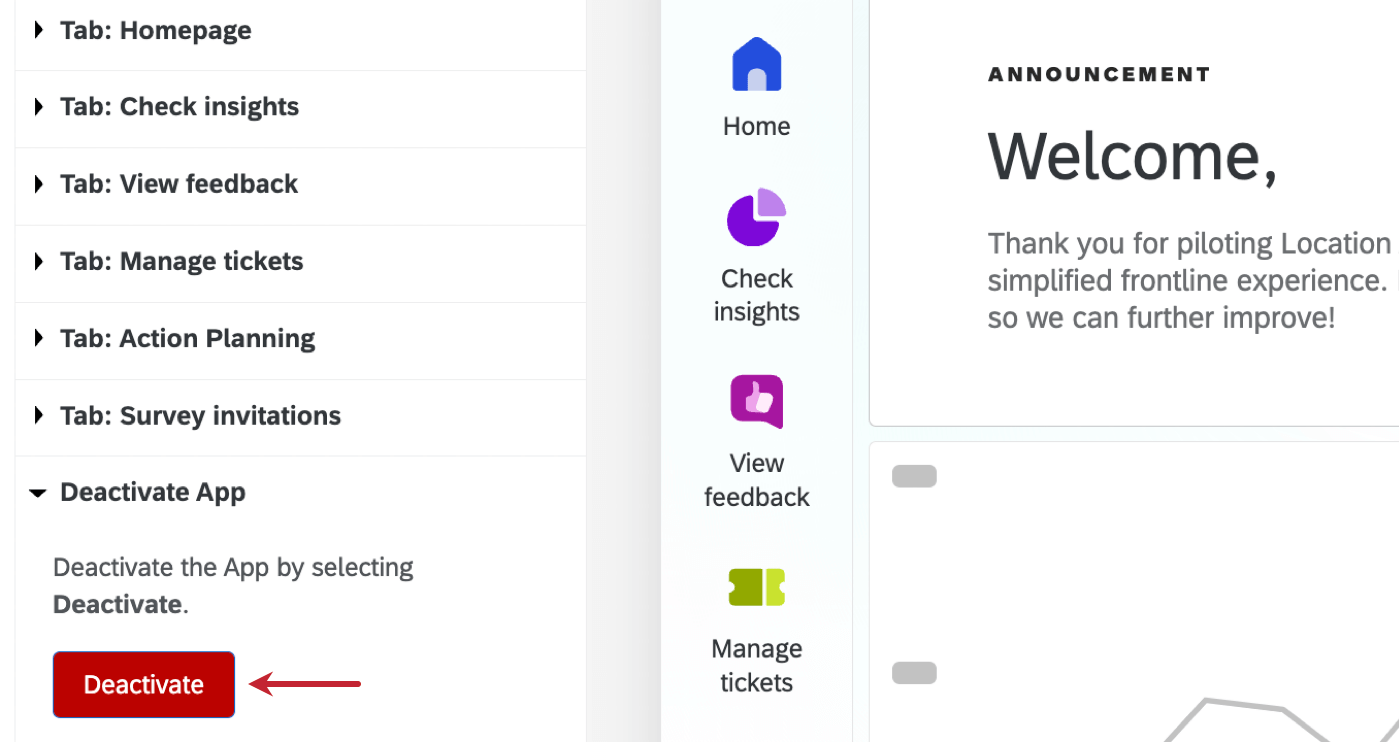
Deactivating Apps
Select Deactivate from the bottom of the settings menu to deactivate an app. This option is available when it is active or in preview.
App Permissions
For apps that only have a single instance, access can be shared by assigning an individual user or an entire user type the relevant permission in the Admin tab. See the linked support pages below for more information on which permission is needed for each app.
For apps with multiple instances, in addition to assigning users the relevant permissions, they also need to be given role-based access to each app they should have access to. See Role-Based App Access for instructions.
Role-Based App Access
For apps that allow multiple instances, access can be managed in the Users or Role access tabs within the app.
Users Tab
In the Users tab you can view all CX Dashboard Users within your brand. This tab functions the same as the User Admin tab in CX Dashboards. See Managing CX Dashboard Users for more information on creating and managing users.
Role Access Tab
In the Role access tab you can view all CX Dashboards Roles created within your brand. See Creating Roles for more information on roles and how to create new ones. Select a role to view the users within the role, add users, or edit users.
To add an app to a role, follow these steps:
- Navigate to the Role access tab of your app.

- Select a role.
- Click Add app.
- Select the app to add from the dropdown.
- Modify which app permissions users in the role will have:
- View app: View the app once it has been activated.
Qtip: When you add an app to a role, all users in that role will have this permission. To remove it, delete the app from the role.
- Edit app configuration: Edit the settings and appearance of the app. This permission should be given to administrators of the app.
- Activate app: Activate the app.
- Manage app users: Share the app and manage users who have access to it.
- View app: View the app once it has been activated.
App Switcher
If you have access to multiple apps, you can switch between them using the app switcher menu.
- Click the dot grid icon in the top-right of your screen.
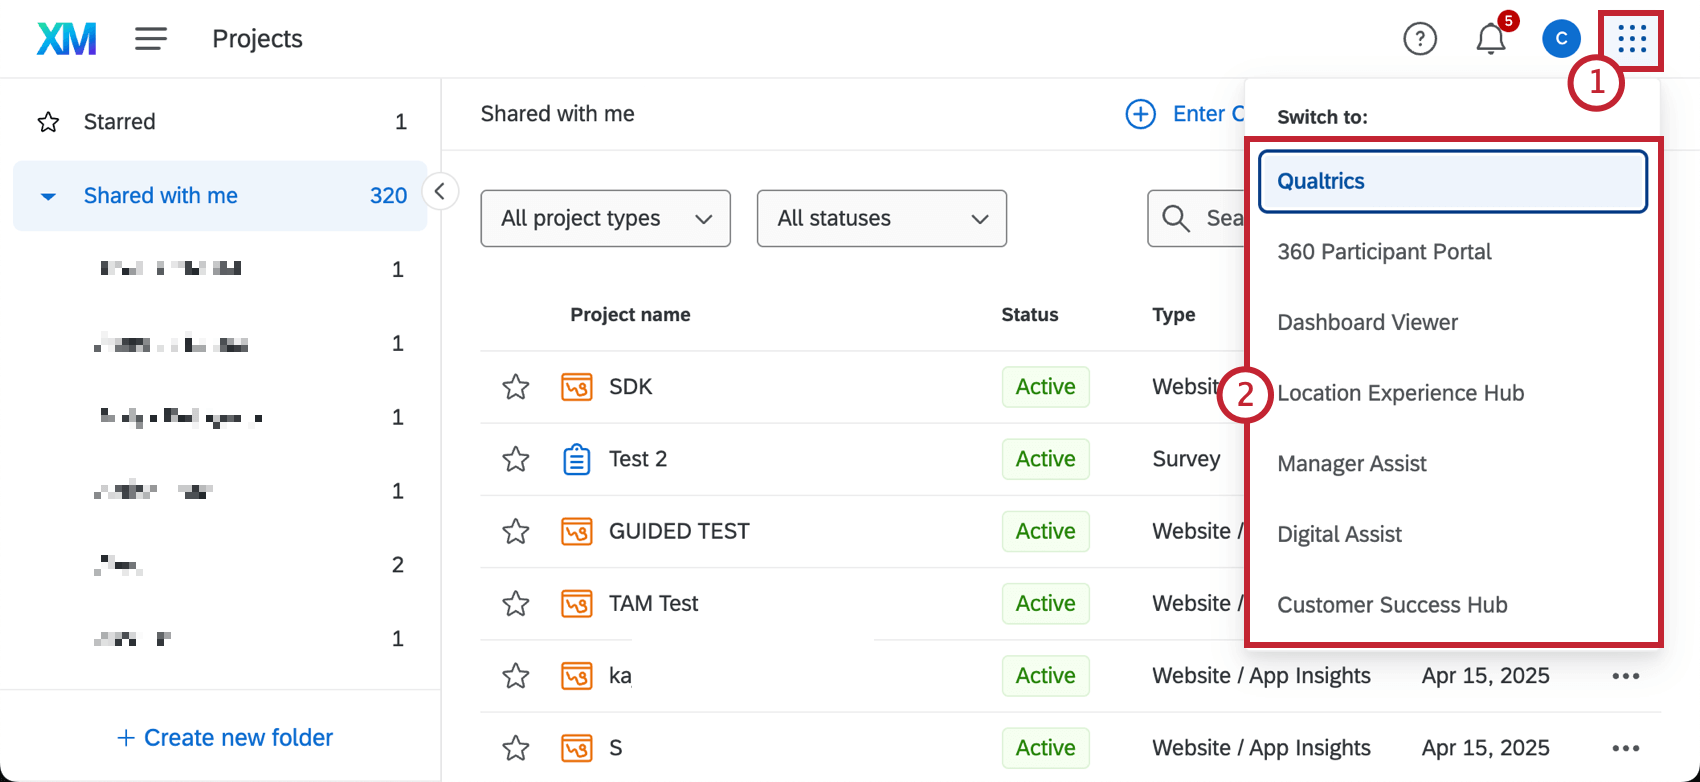
- Select an app from the list.